

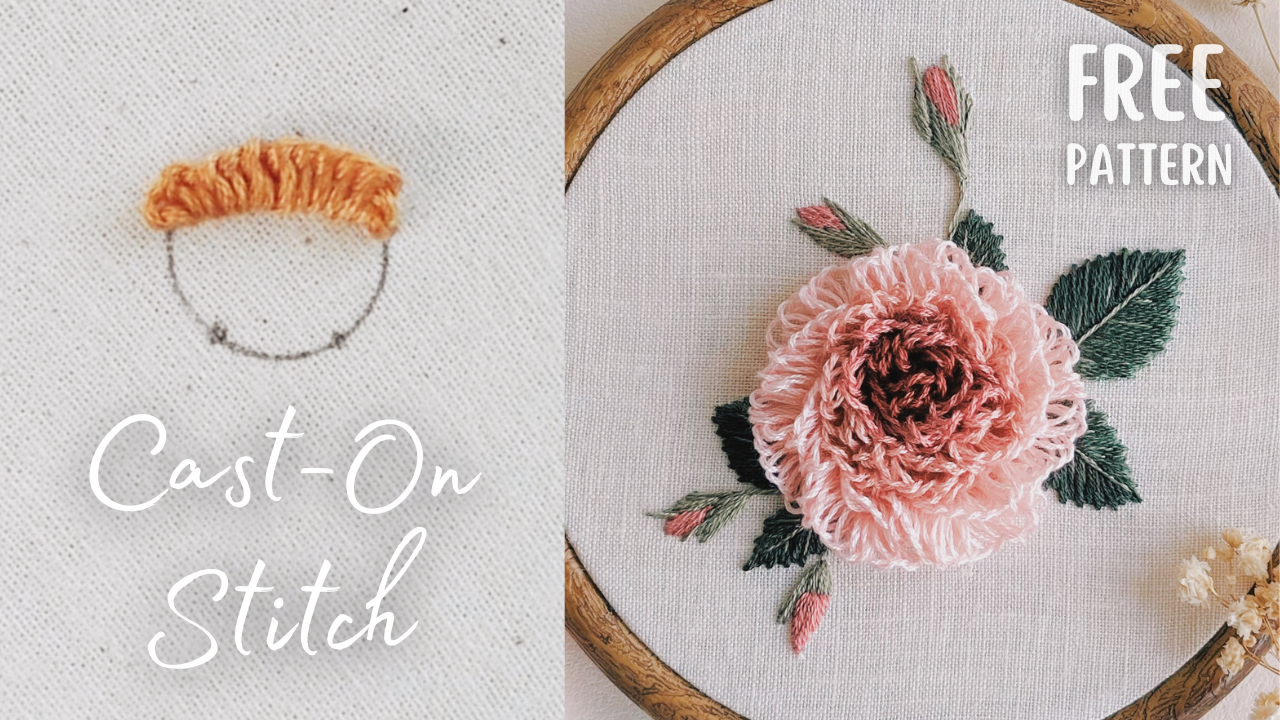
Welcome back to another fun lesson! Today, let's add a touch of magic to our stitching repertoire with the enchanting Cast-On Stitch. This stitch isn't just a stitch; it's a gateway to creating stunning, three-dimensional floral wonders that will leave everyone in awe. So, let's get started!
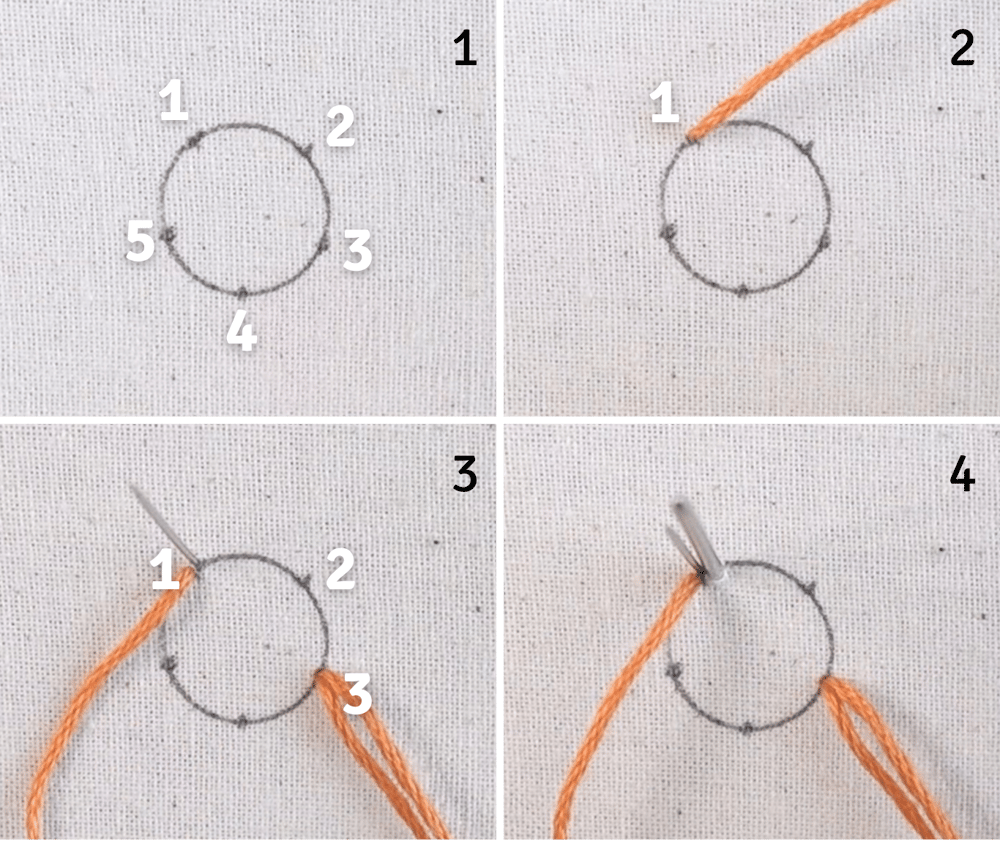
(1) To begin, draw a circle and I marked some points to indicate how many petals you would like to create. In this example, there are five points, meaning I can make maximum five petals.
(2) Start by bringing the needle up from the back of the fabric at point 1.
(3) Skip point 2 and bring the needle down at point 3. Then, come up again at point 1, but don't pull the needle out just yet.
(4) It's totally optional but I often use a big blunt needle to add more volume to the Cast-On stitch. Insert the big blunt needle near your working needle if you use one.
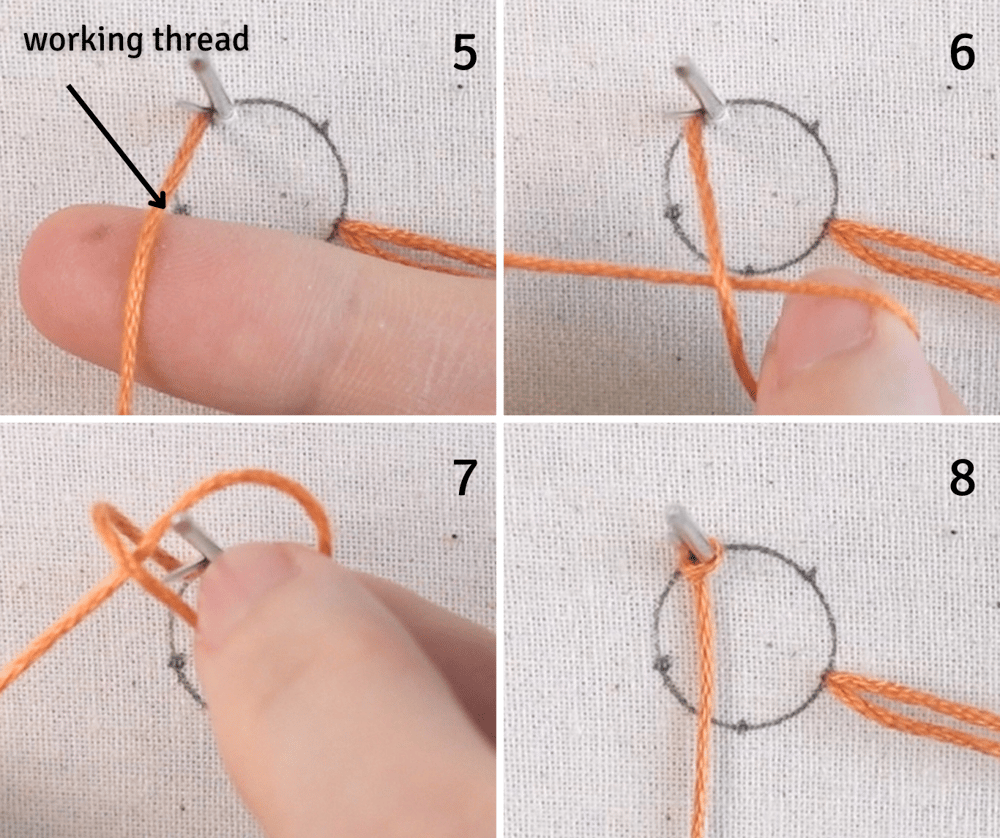
(5) Lift up the working thread and put the working thread over your index finger.
(6) Roll your finger towards you to form a loop.
(7) Hold on to the same position and drop this loop onto the needle,
(8) Pull the thread to secure the loop on the needle.
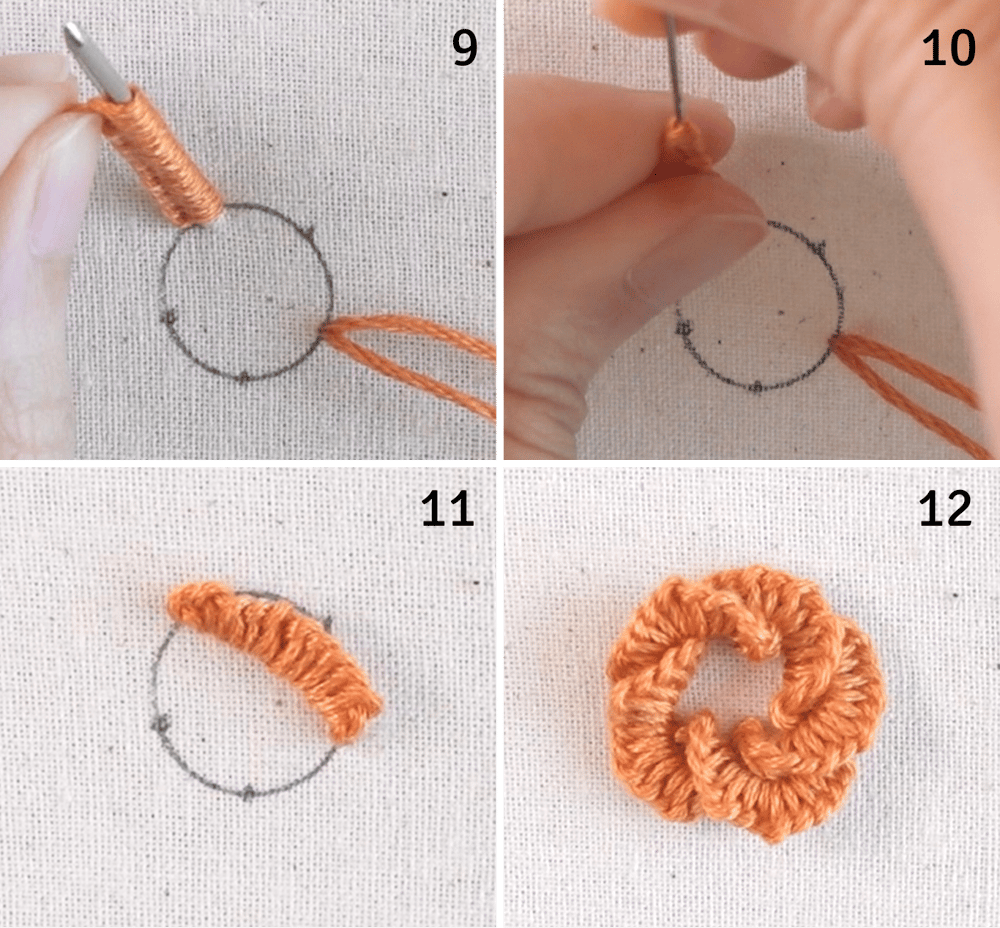
(9) Repeat this process to create as many loops as needed. The distance between point 1 and 3 is the minimum size of the petal. The more loops you add, the higher the stitch or petal will sit off the fabric surface.
(10) Once you've created enough loops, gently remove the blunt needle if you use one and pull the needle through all the loops while using your other hand to gently hold them in place.
(11) Lay the stitch down gently, adjust the loops if necessary, and secure the stitch at the ending point. Your first stitch/ petal is done!
(12) Repeat this process for the remaining petals. Be consistent with how the petals overlapping with the previous ones. And that's it, your beautiful flower is done!
Practice Pattern
Download this free practice pattern here
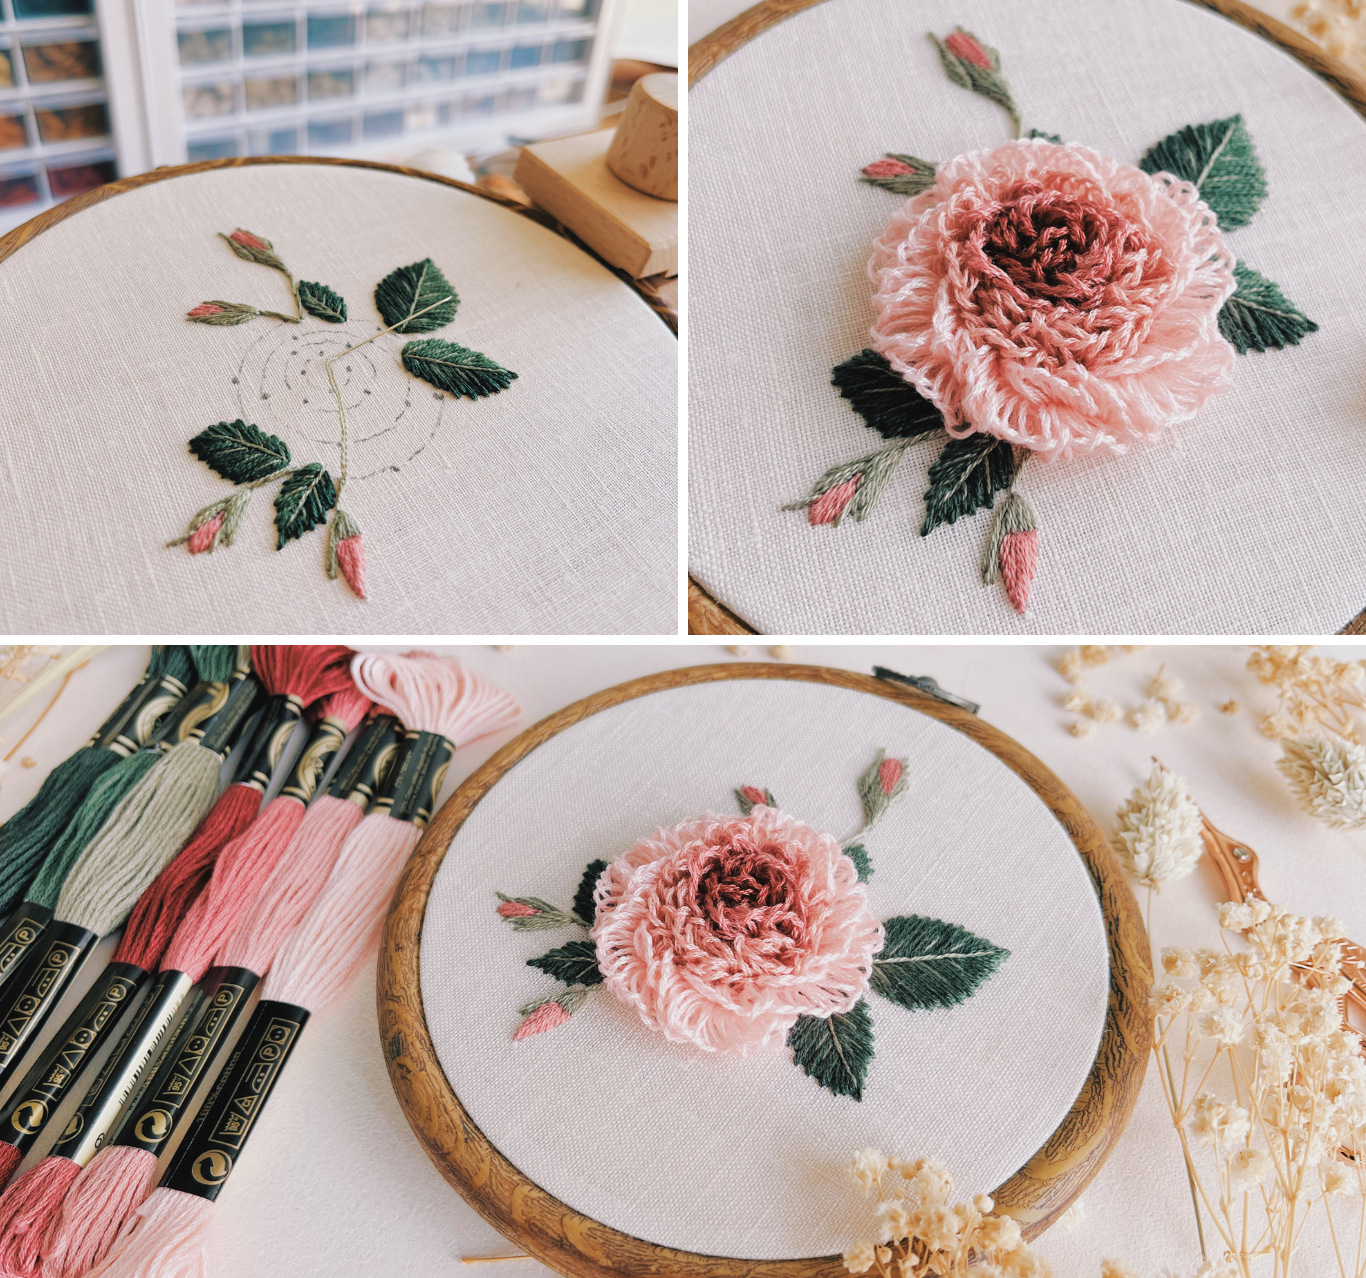
For this beautiful garden rose, I stitched four rounds of petals, four shades of dusty rose that gracefully transitions to a brighter hue as you move outward.
In each round, I marked some points to help you visualize where to start and end the Cast-On stitch. Whenever you bring the needle up to start a petal, remember to always take the needle down after skipping 1 point.
Don't forget to watch the YouTube video for step-by-step guide to stitch this pattern.

While the Cast-On Stitch may not be an absolute beginner, don't worry! After a bit of practice crafting these flowers, you'll find yourself seamlessly navigating this stitch. Before you know it, the rhythmic motion will feel second nature, unveiling exquisite, lifelike 3D flowers on your fabric.
I hope you have fun and happy stitching!
Comments ()