

Disclosure: some of the links you'll find here are affiliate links. When you use them to grab some embroidery goodies, I may earn a teeny tiny commission at no extra thread to you.
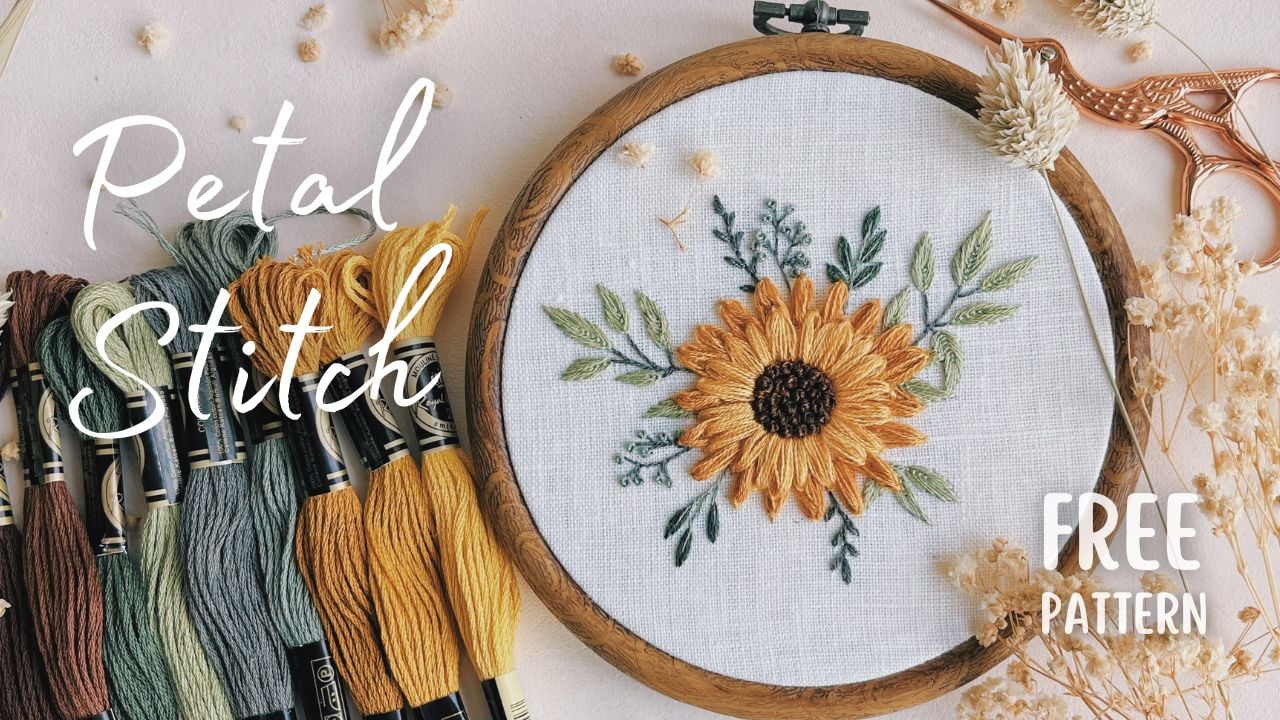
Hello, my fellow embroidery enthusiasts! I'm thrilled to have you back for another tutorial from our Hand Embroidery Stitches series. Our focus today is on the delightful Petal stitch, a fun technique well suited for creating stunning flower petals. Despite its simplicity, this stitch brings remarkable texture to your floral designs.
Materials You'll Need:
- Your usual embroidery needle and thread
- A long needle with a large head. I'm using a straight pin with a plastic teardrop head.
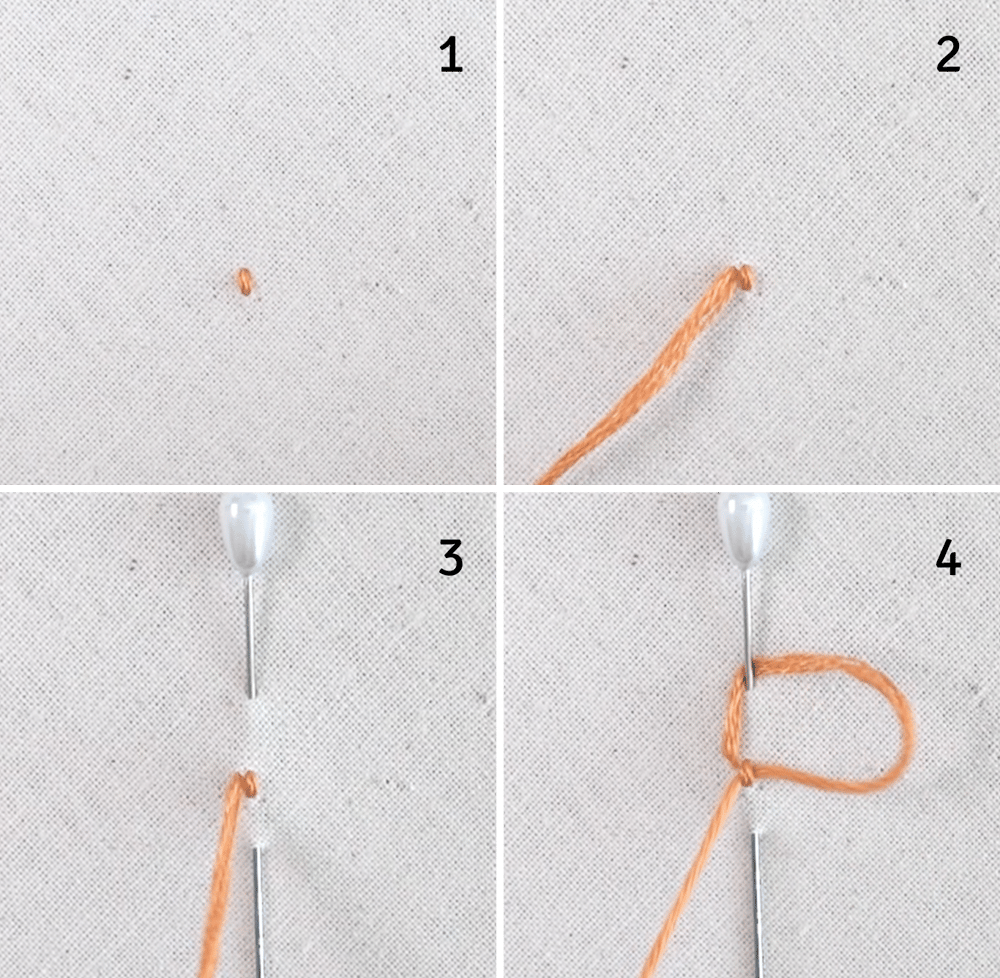
(1) Start by making a small vertical Straight stitch at the base of your petal.
(2) Bring the needle up somewhere near the top of the straight stitch.
(3) Insert the large-headed needle above the Straight stitch. The distance from the pin to the straight stitch should be approximately the length of the petal, around ½ inch or 1cm in this case.
(4) Next, wrap the thread around the pin and slide it through the Straight stitch to create your first loop. You can make as many loops as you want. Around 4 or 5 is good.
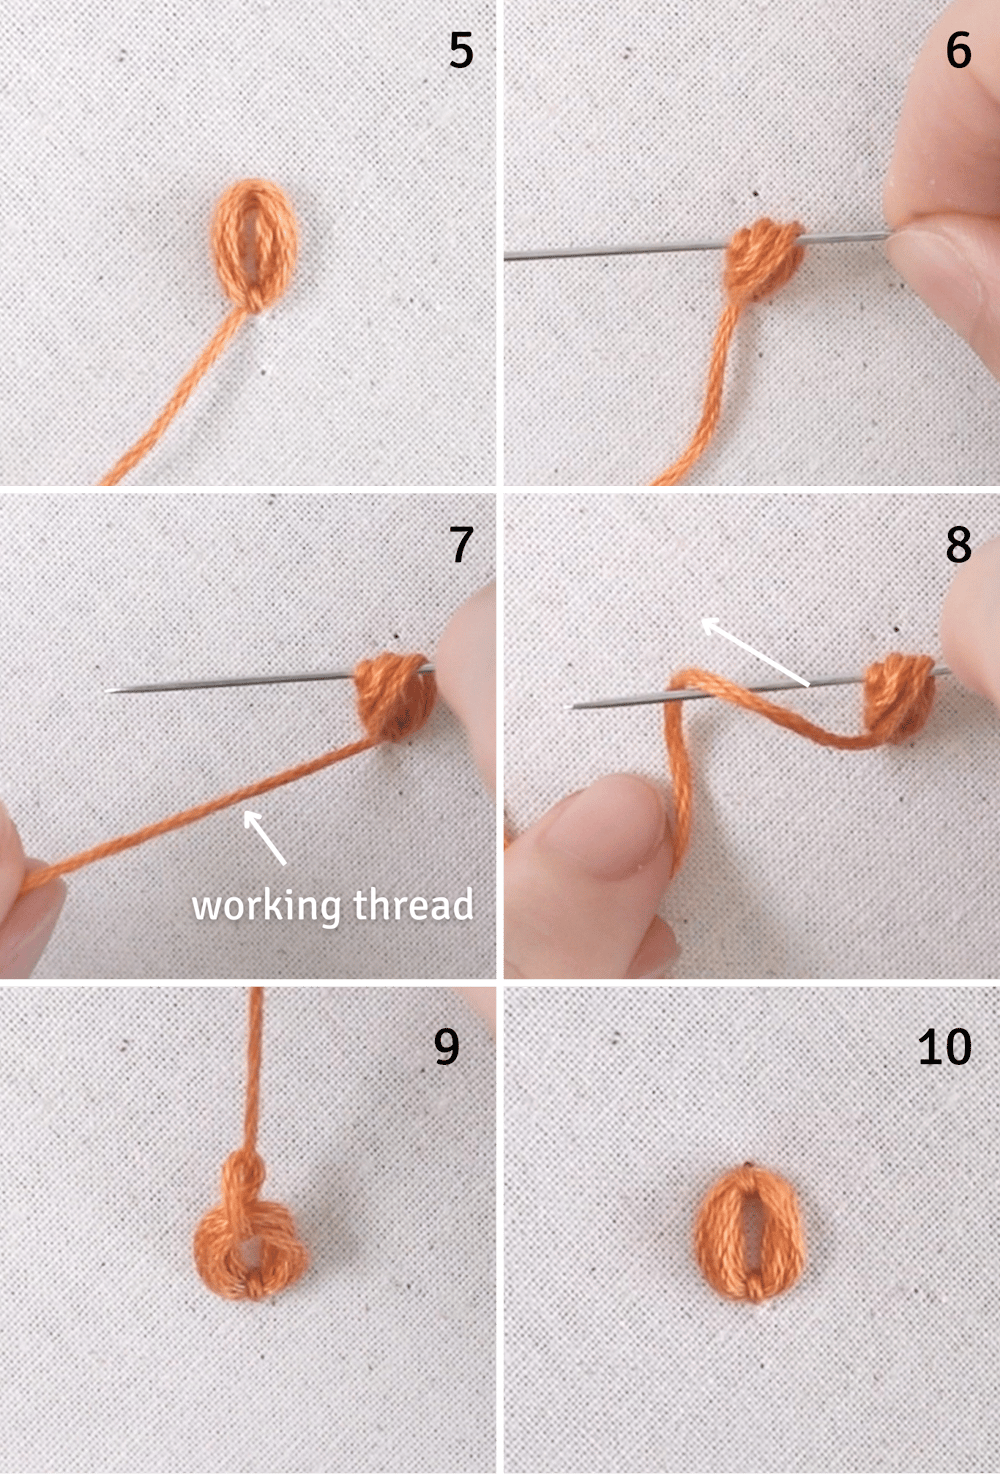
(5) Once you're satisfied with the look of your petal, it's time to secure the loops. Begin by carefully removing the long needle.
(6) Slide the needle through all the loops, gently lifting them up from the center.
(7) Lift the working thread up
(8) and wrap it over the needle, away from you.
(9) Slowly pull the needle all the way through to form a knot. Make sure to adjust the knot so that it sits at the center of the loops.
(10) Lay the petal down on the fabric and secure it by taking the needle down at the top of the petal. Congratulations, you've completed your petal!
Variation 1
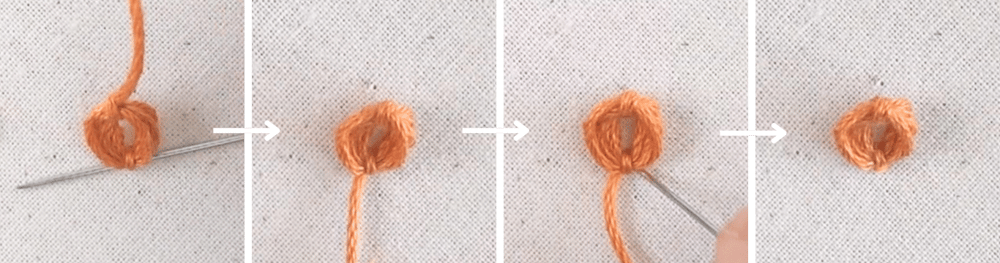
If you want your petal to sit off the fabric surface:
- Slide the needle through the Straight stitch at the base of the petal after making the knot.
- Then make a small stitch over the Straight stitch to secure it.
Variation 2
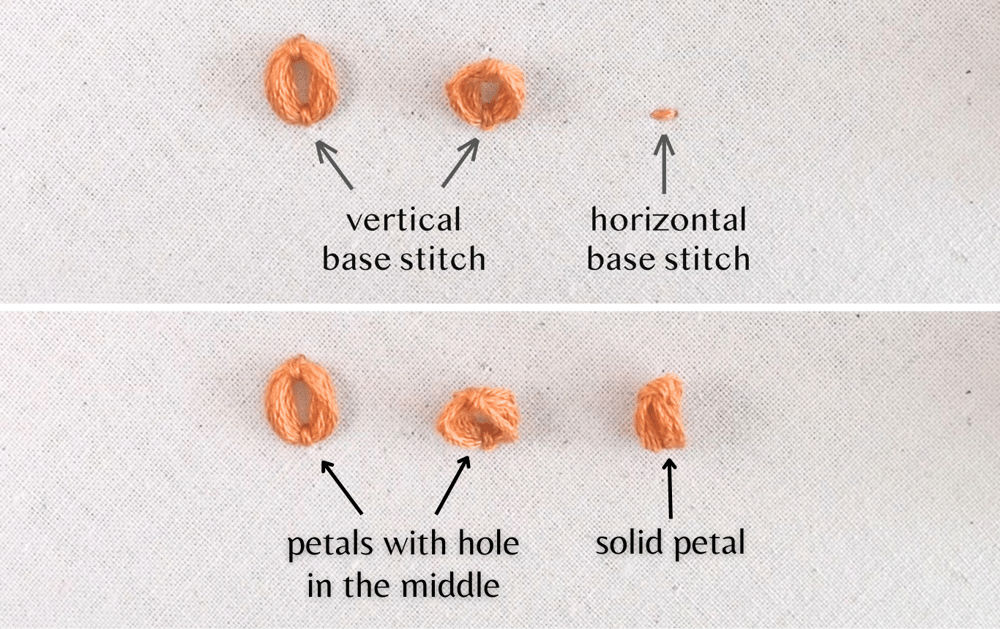
Instead of a vertical straight stitch at the base, you can try a horizontal straight stitch. The process remains the same but at the end, you will have a solid petal without a hole in the middle no matter if the petal is laying flat or free-standing.
Practice Pattern
Download this free practice pattern here
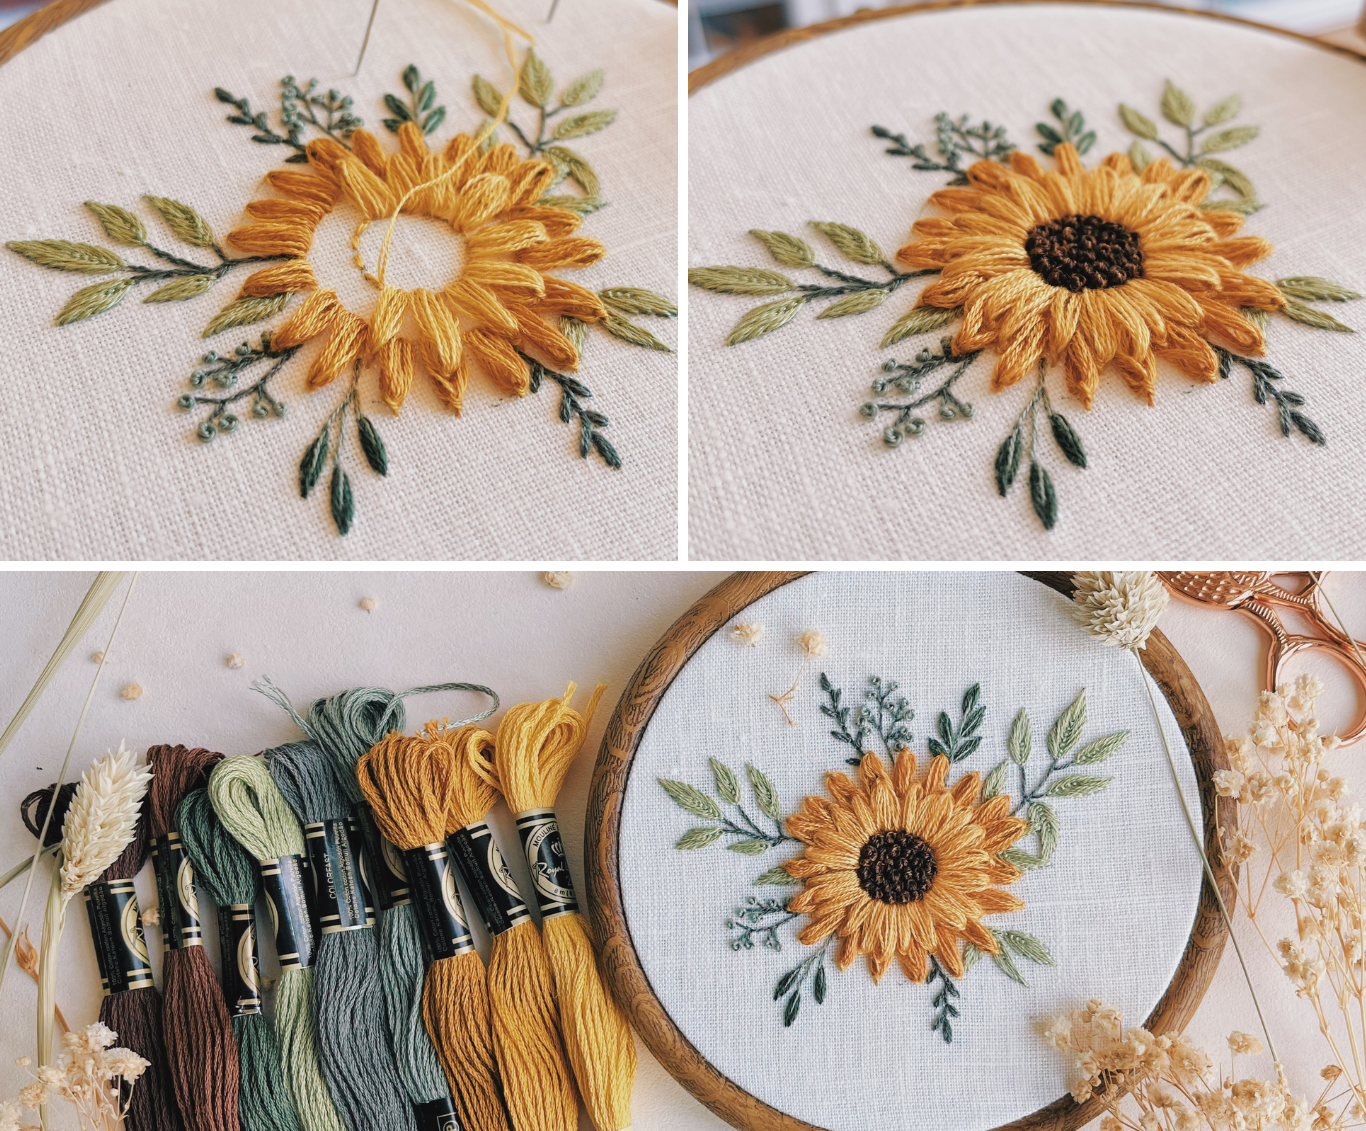
For this beautiful sunflower, I stitched two rounds of petals with three shades of yellow for added texture and depth.
During the process, you might need to occasionally insert the long needle onto existing embroidery and that's perfectly okay. You won't ruin the embroidery so don't worry. Trust the process and follow all the steps as usual.
Don't forget to watch the YouTube video for step-by-step guide to stitch this pattern.

Although the Petal Stitch might not be the easiest for beginners, there's no need to worry! With some practice in creating these petals, you'll soon become adept at using this technique. In no time, the repetitive motion will become natural to you, revealing stunning, lifelike 3D floral designs on your fabric.
I hope you have fun and happy stitching!
Comments ()