
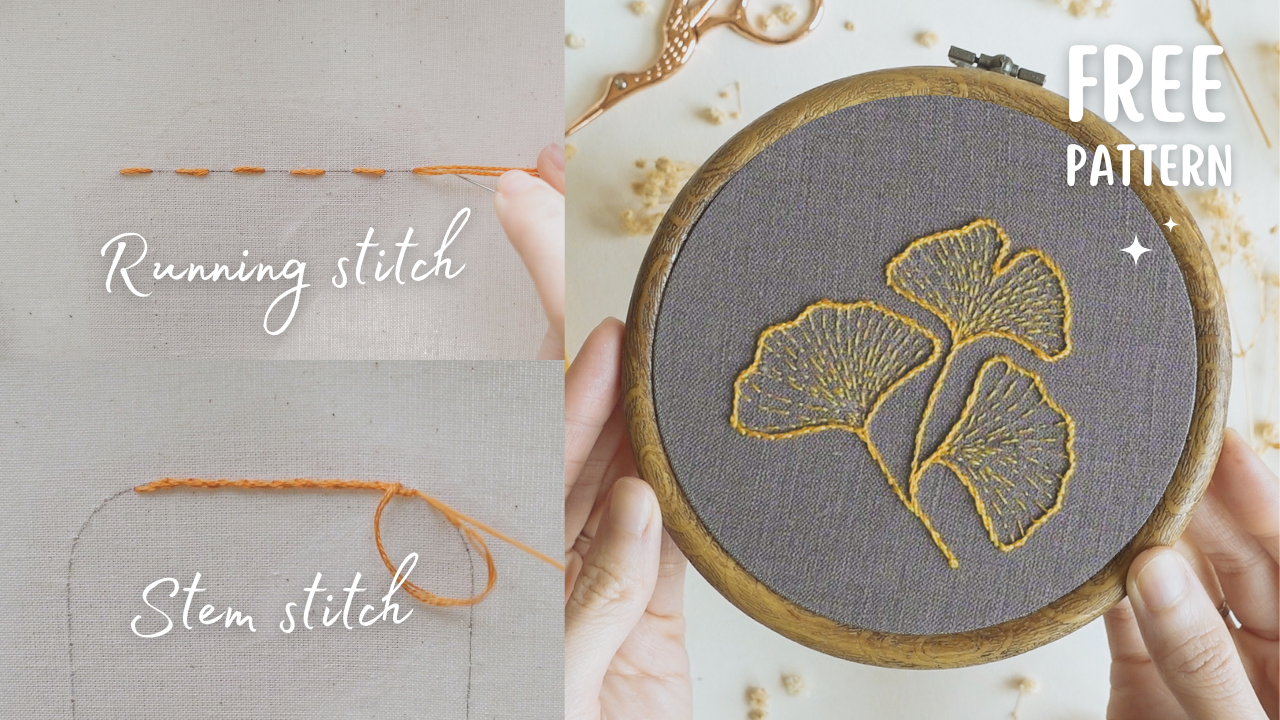
For our very first lesson of the series, I have a couple of gems for you: Running stitch and Stem stitch. These two may be basic, but they're incredibly versatile and perfect for outlining, shaping, and embroidering texts.
Running Stitch: simple yet elegant
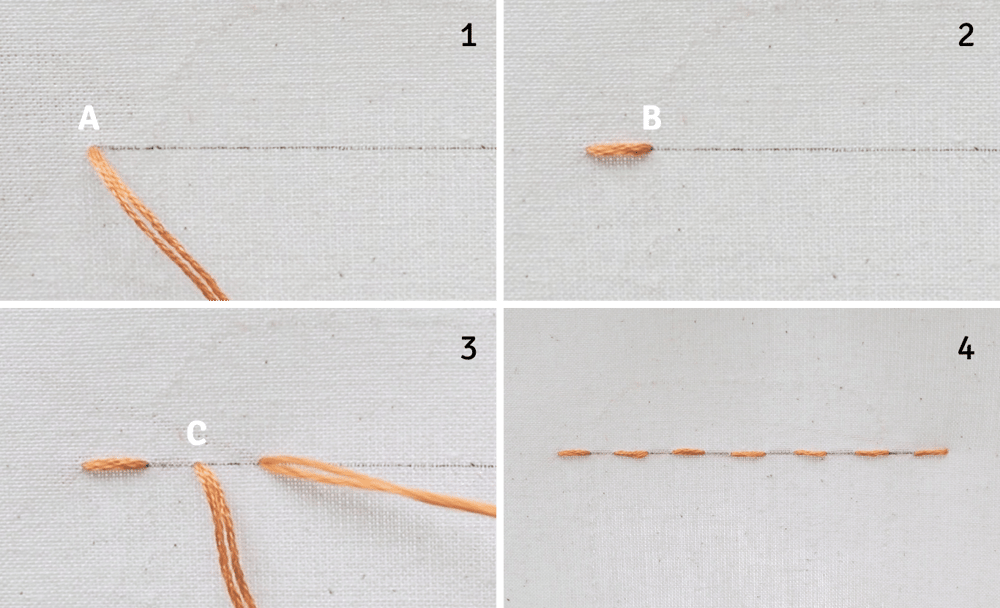
- Start by bringing the needle up through the back of the fabric at (A).
- Take the needle down a stitch length at (B) to create the first stitch.
- Start the second stitch by bring the needle up again a gap length at (C) and take it down a stitch length.
- Repeat the same process until you reach the end of the line.
Don't underestimate its simplicity; with the Running stitch, you can produce beautiful and elegant designs.
For instance, you can try your hand at a Sashiko-inspired pattern. Sashiko, which means "little stabs" in Japanese, originally served to reinforce fabric using this very stitch. With evenly spaced stitches, you can create geometric wonders like these one.
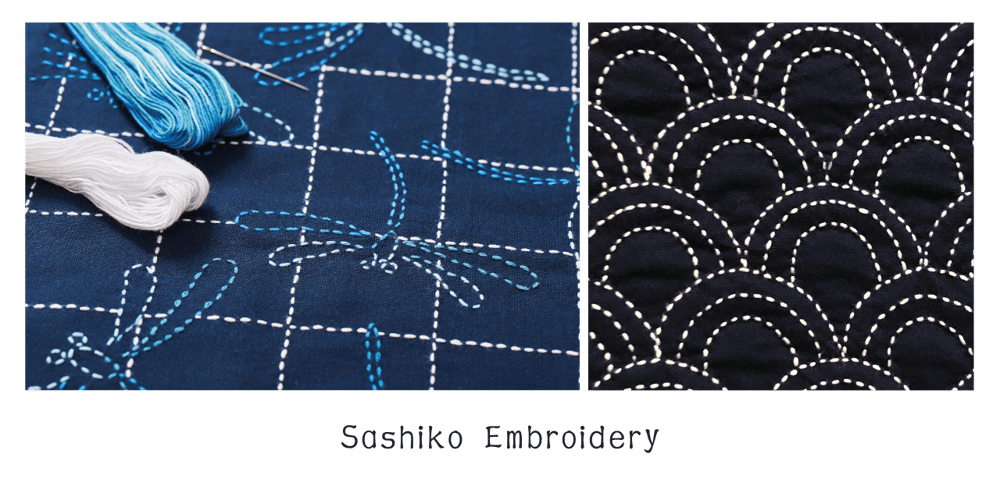
But hey, don't let uniformity hold you back. You can also play around with varying the length of your stitches and the gaps between them create for a more organic look, just like in our practice pattern.
Stem Stitch: Crafting the Signature Rope-Like Look
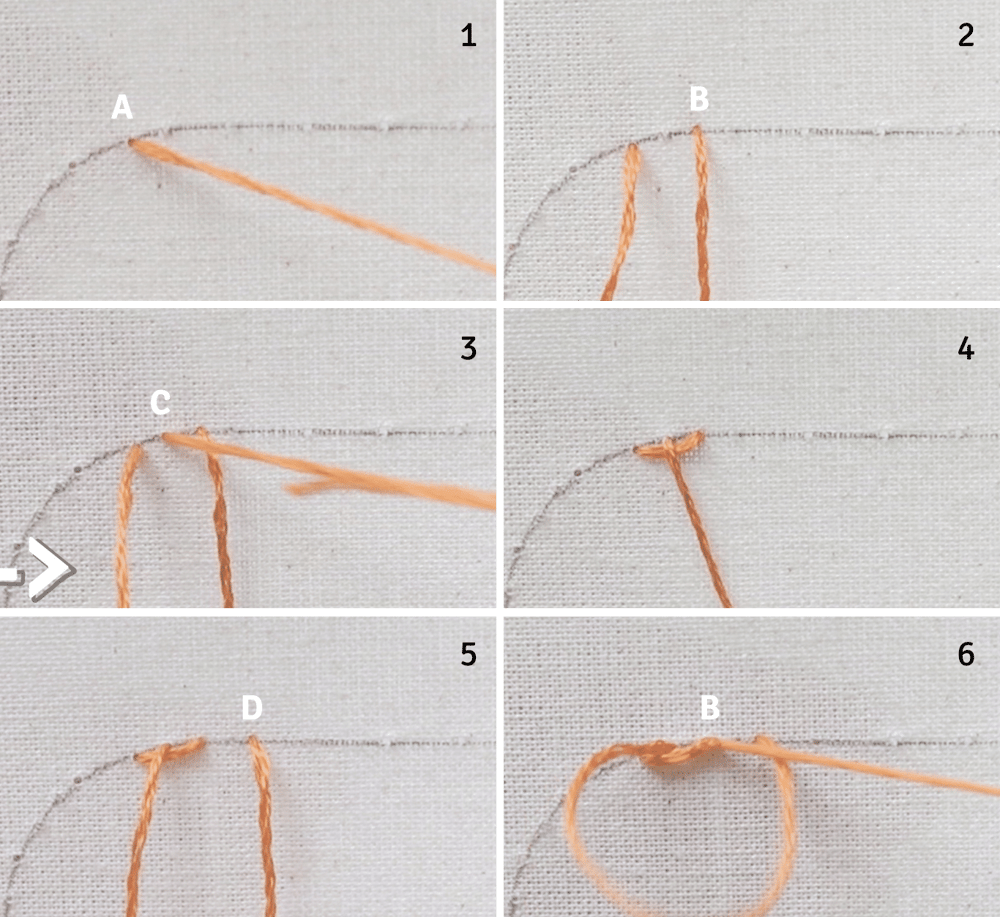
- Start by bringing the needle up through the back of the fabric at (A)
- Take the needle down a stitch length at (B) but don't pull the thread all the way through; leave a small loop.
- Bring the needle up about halfway along the first stitch at (C), ensuring that the loop is below the needle so that when the thread comes up, it overlaps the previous stitch.
- Pull the thread all the way
- Make the second stitch by taking the needle down a stitch length at (D)
- And come up at the end of the previous stitch at (B). Pull the thread all the way.
Continue making a row of overlapping stitches. This will create the signature ‘rope’ look of the stem stitch.
As you can see, the position of the loops changes depending on which way you're stitching.
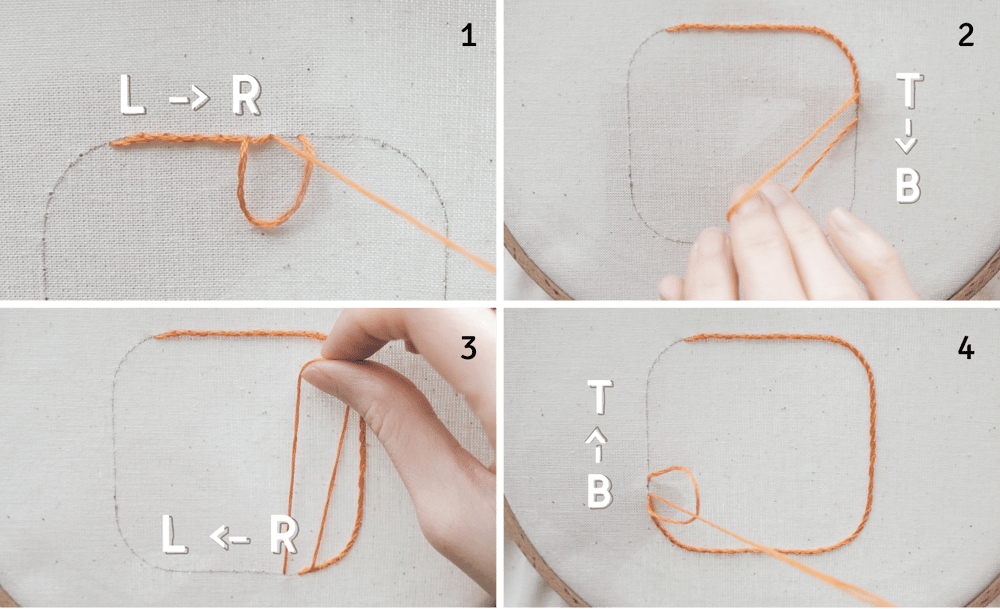
- When moving from left to right, the loops are below the needle.
- When going from top to bottom, they shift to the left side.
- When moving from right to left, they're above the needle.
- When stitching from the bottom to the top, the loops reside on the right side.
*If you are left handed and prefer to stitch from right to left, just remember that the loops will be above the needle.
Feeling a bit overwhelmed? Don't worry! It'll all come together with some practice. This rounded square is perfect for honing your skills and getting ready for the fun practice pattern!
Even if you position the loops on the ‘wrong’ side, it’s not the end of the world – you'll actually create an Outline stitch, with a smoother and less "ropy" texture.
*Tip
- When working on a rather straight line, you can keep the stitches a bit longer
- For curved areas, you should make shorter stitches to navigate the curve smoothly.
This tip applies to many embroidery stitches. The straighter the path, the longer the stitches can be,
and vice versa.
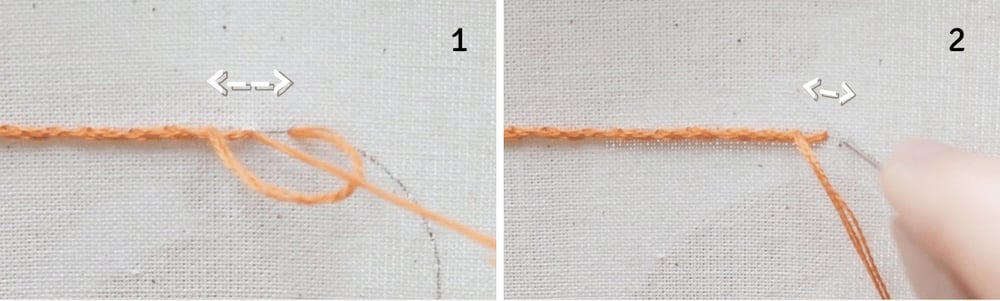
How to close a loop
I'm using the last section of this rounded square to demonstrate how to join the endpoints. This technique comes in handy when embroidering circles with the Stem stitch, for instance.
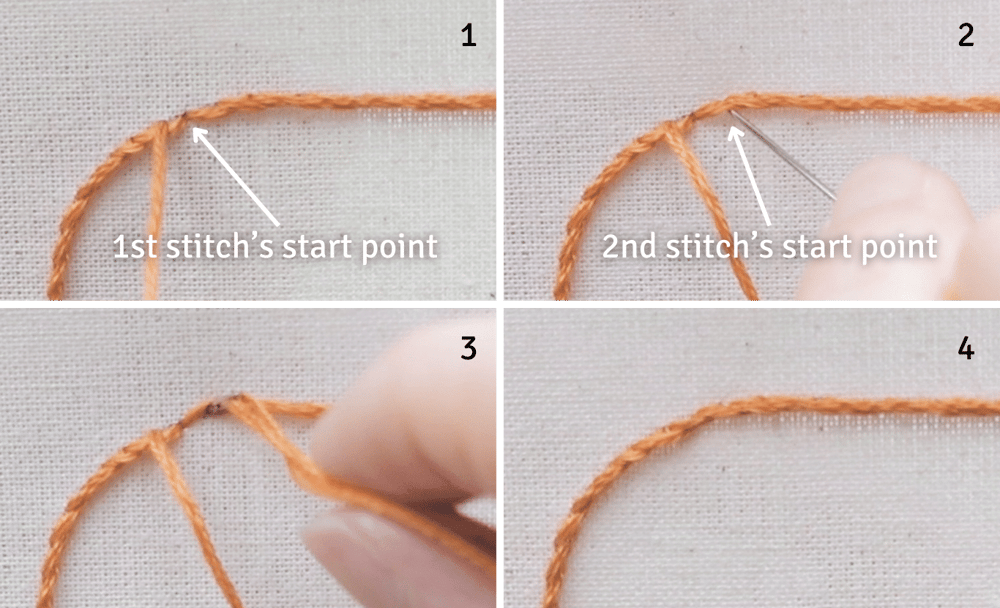
- Joint the endpoints by taking the needle down where the first stitch began. The edge is closed, but for a seamless look, we will make another stitch.
- Take the needle down beneath the first stitch, at the start point of the second stitch
- Pull the thread all the way. Notice how the last stitch nicely overlaps the first stitch.
- Voilà! Your design looks seamless now.
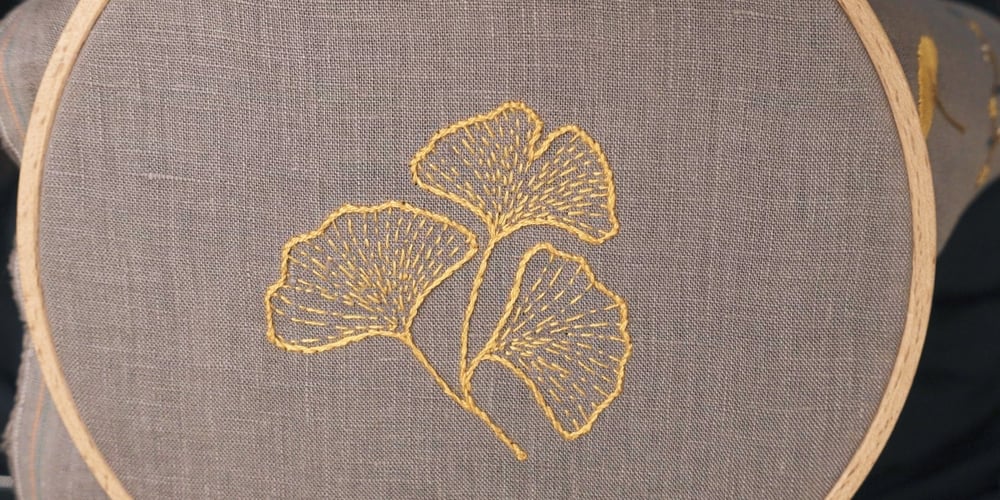
Practice Pattern
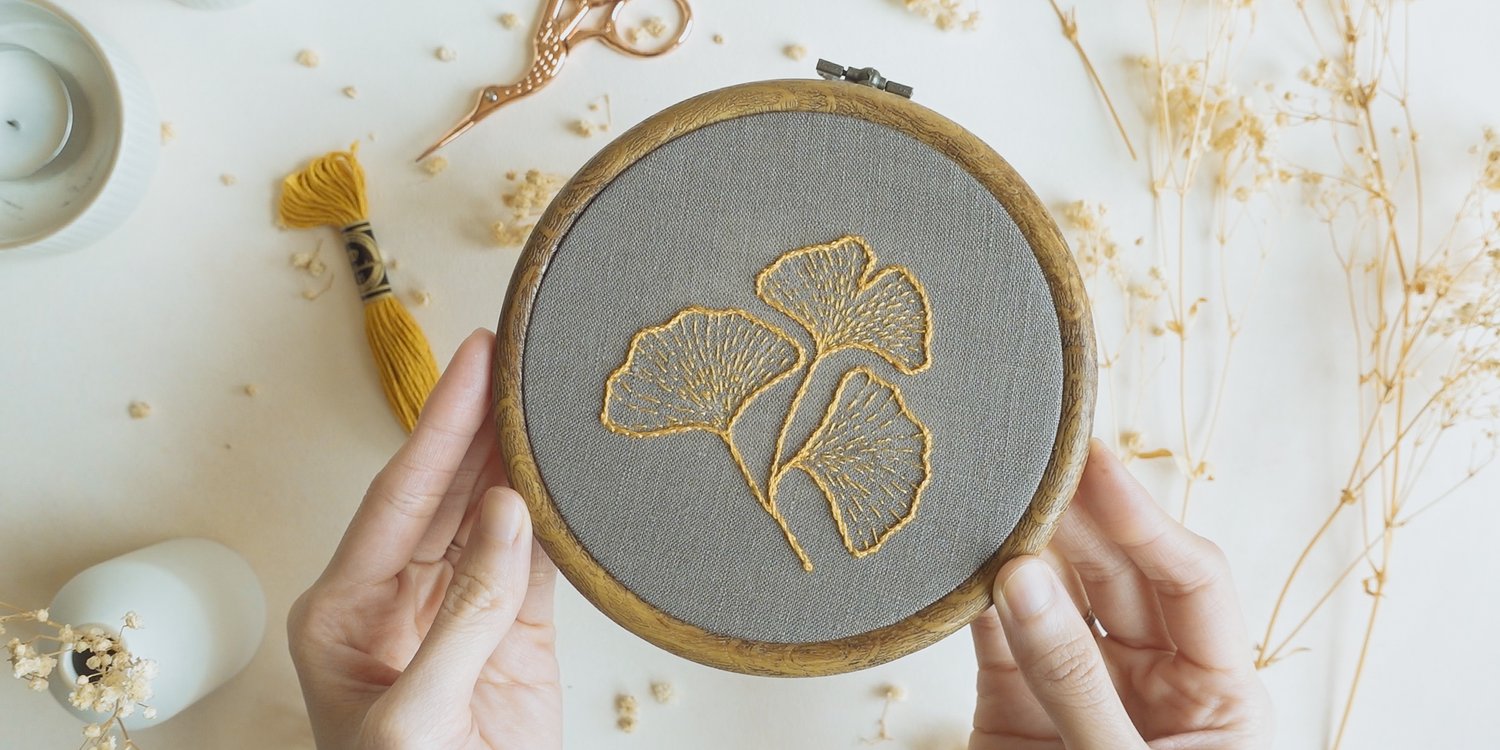
Download this free practice pattern here
All the inner lines inside the leaves are done with the Running stitch while the outline of the leaves is done with the Stem stitch.

Don't forget to watch the YouTube video for step-by-step guide to stitch this pattern.
And there you have it – a perfect duo of stitches and a practice pattern to embark on this embroidery adventure. So let's get started and happy stitching!
Comments ()