

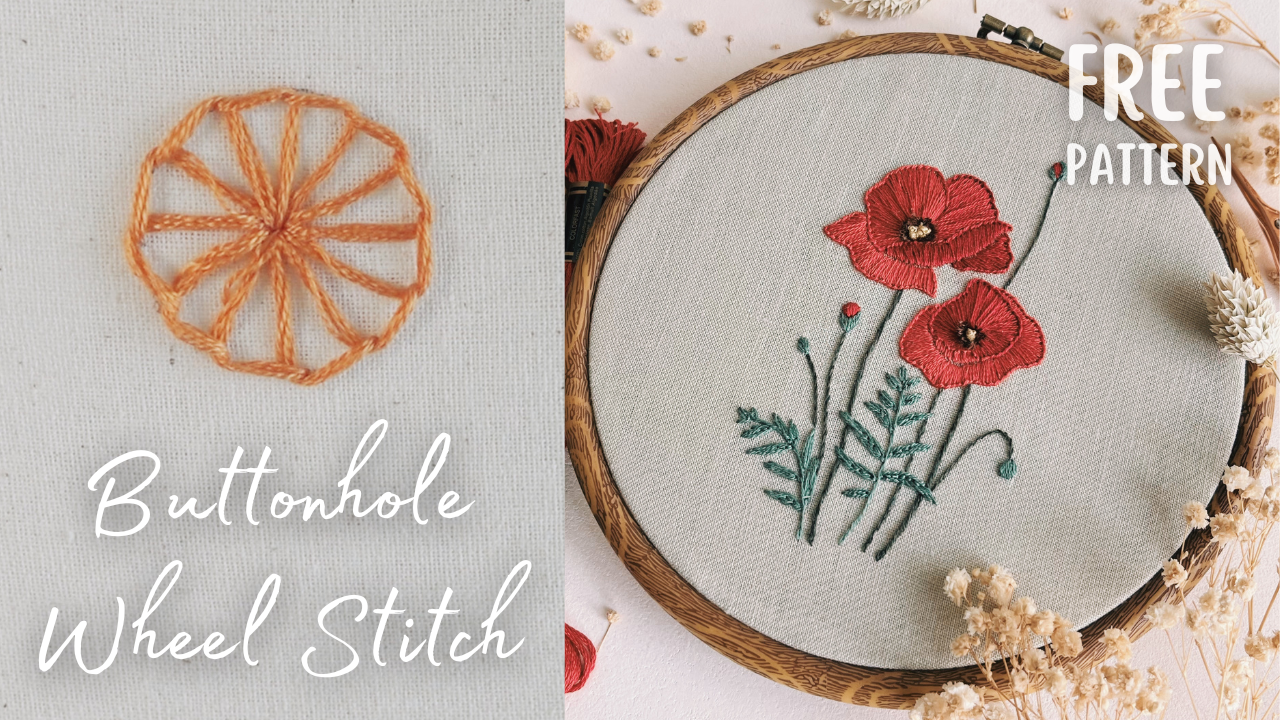
Welcome back for another fun lesson of the Hand Embroidery stitch series! Today, we'll discover a stitch that might surprise you — the Buttonhole Wheel Stitch. This stitch might not be a top choice for creating flowers but it totally should be.
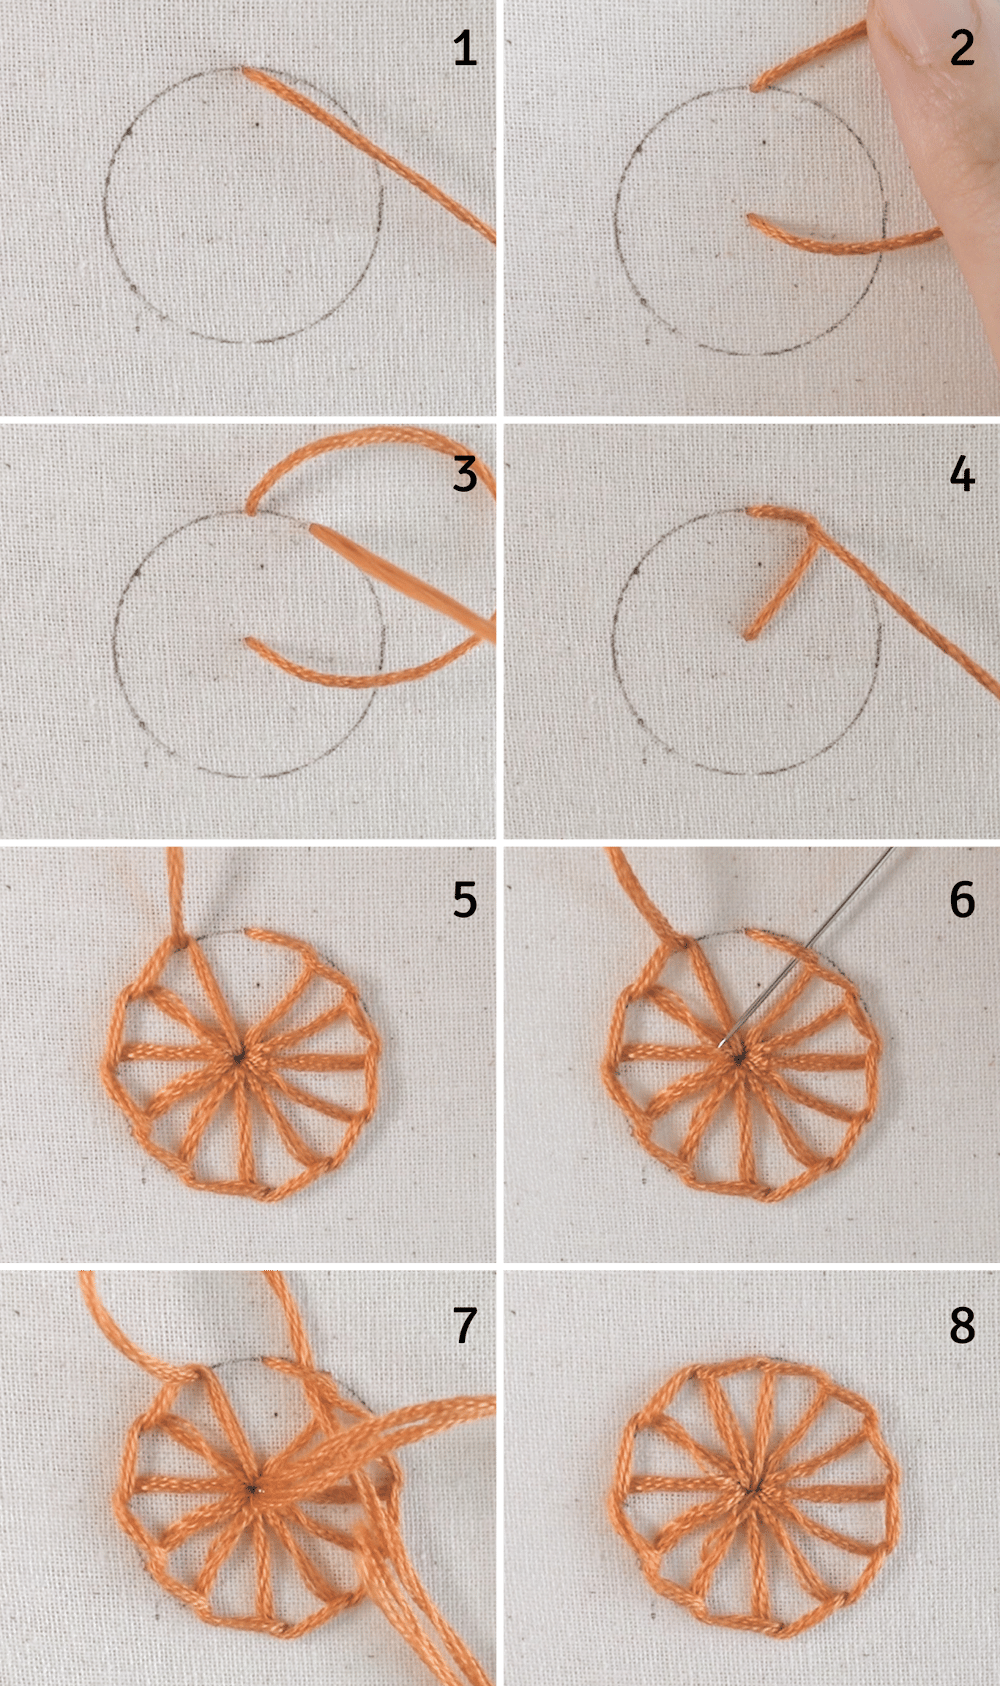
- Start by bringing the needle up from the back of the fabric and emerge somewhere along the drawn circle.
- Take the needle down at the center of the circle, but don't pull the thread all the way through, leaving a loop on the surface.
- Just like the Blanket Stitch, bring the needle up a stitch length inside the loop
- Pull the thread all the way. This completes your first stitch.
- Repeat the same step until you reach the end of the circle. A helpful tip: pull the thread forward in the direction of the next stitch to help keep the stitch in place.
- When you are just one stitch away from touching the first stitch, slide the needle under the loop of the first stitch.
- Take the needle down at the center.
- Now the circle looks seamless.
Practice Pattern
Download this free practice pattern here
Don't forget to watch the YouTube video for step-by-step guide to stitch this pattern.

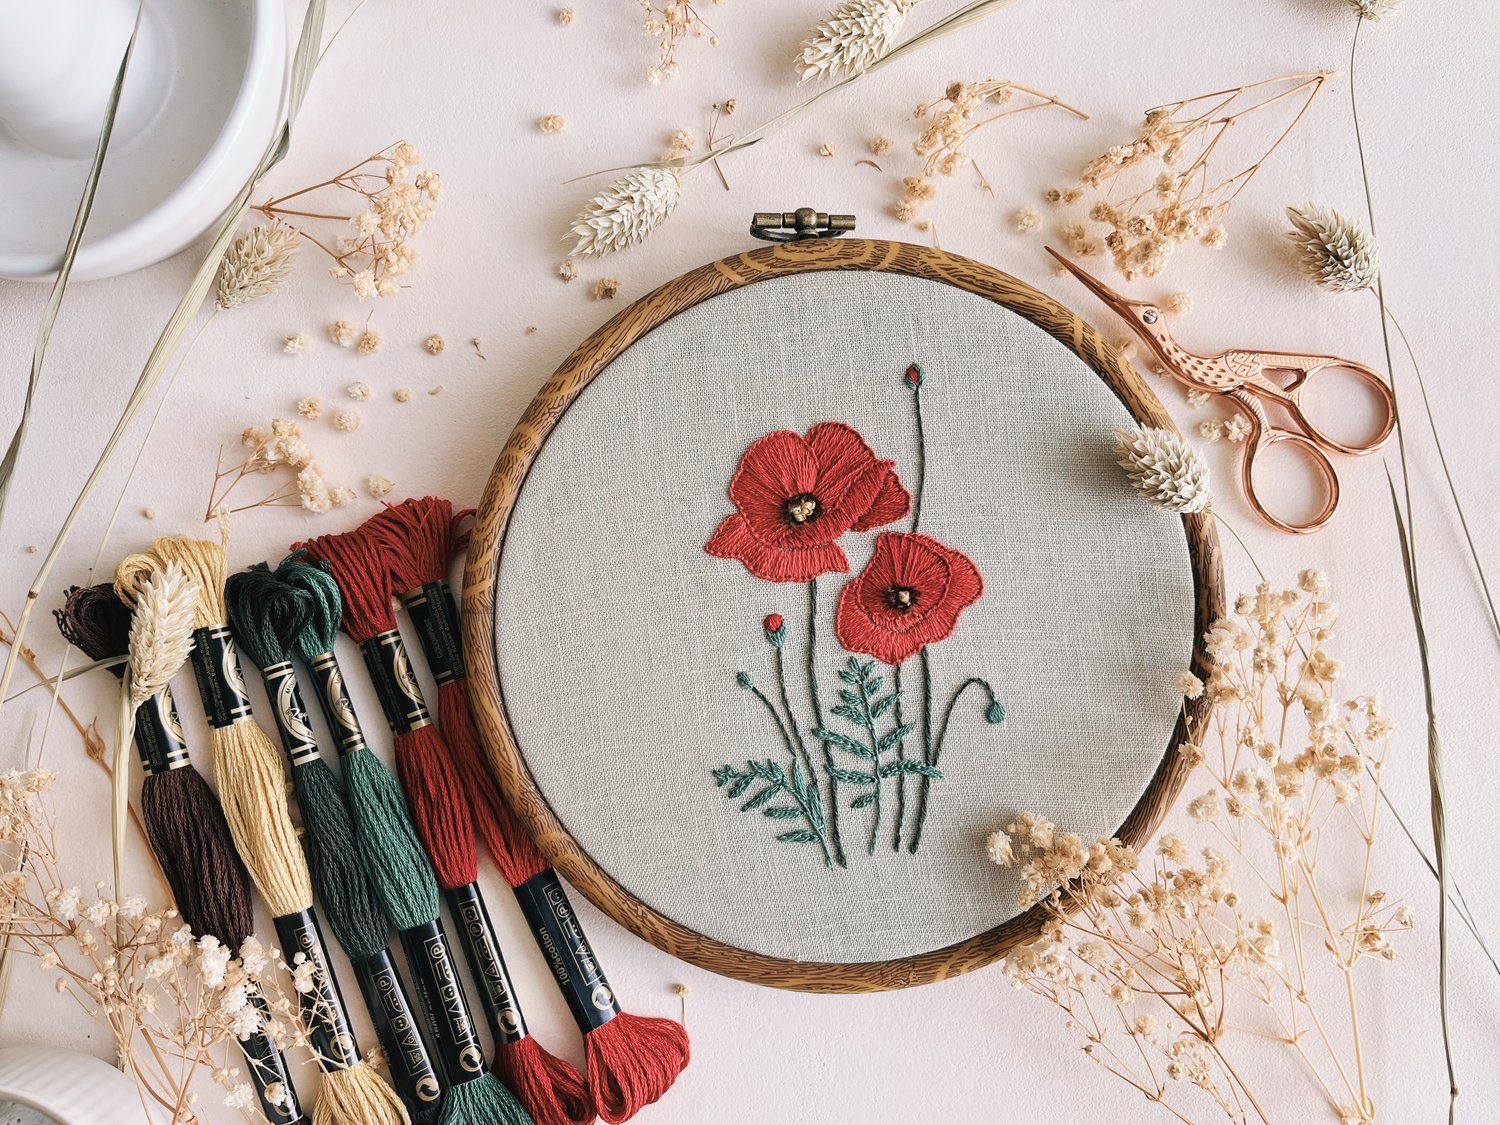
The Buttonhole Wheel stitch is perfect for making flowers as it can be a great filling stitch. You can easily create a flower petal, and the stitch also creates a raised edge, adding a 3D effect to your work.
If I were to created these poppies flowers with other stitches like the Long and Short stitch, it would have taken me a much longer time and effort. However with the Buttonhole Wheel stitch, the petals' outline can be done easily and beautifully. Then you can simply use Straight stitches to filling in.
I hope you have fun and happy stitching!
Comments ()