

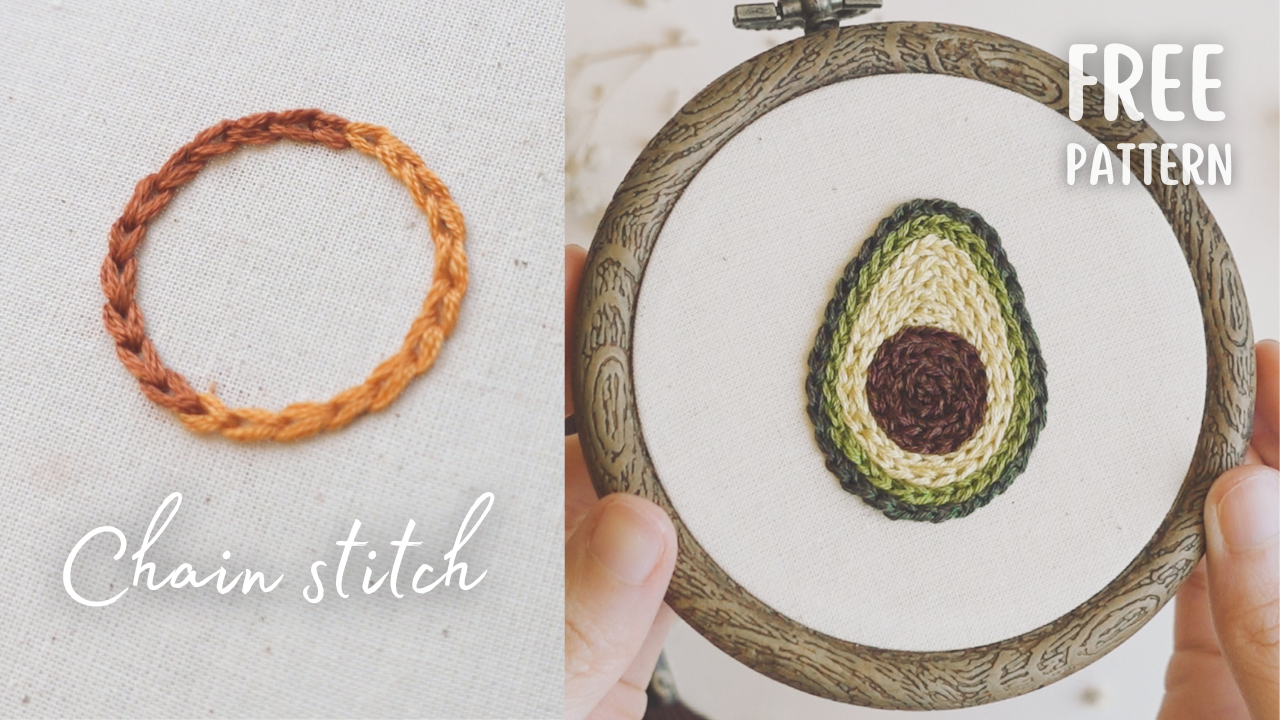
In this lesson, we will learn about one of my most favourite stitches, the Chain stitch! It's perfect for outlining straight and curved lines, lettering, and even filling areas with great texture. It's also a very durable stitch than can be used on washable items.
Chain stitch
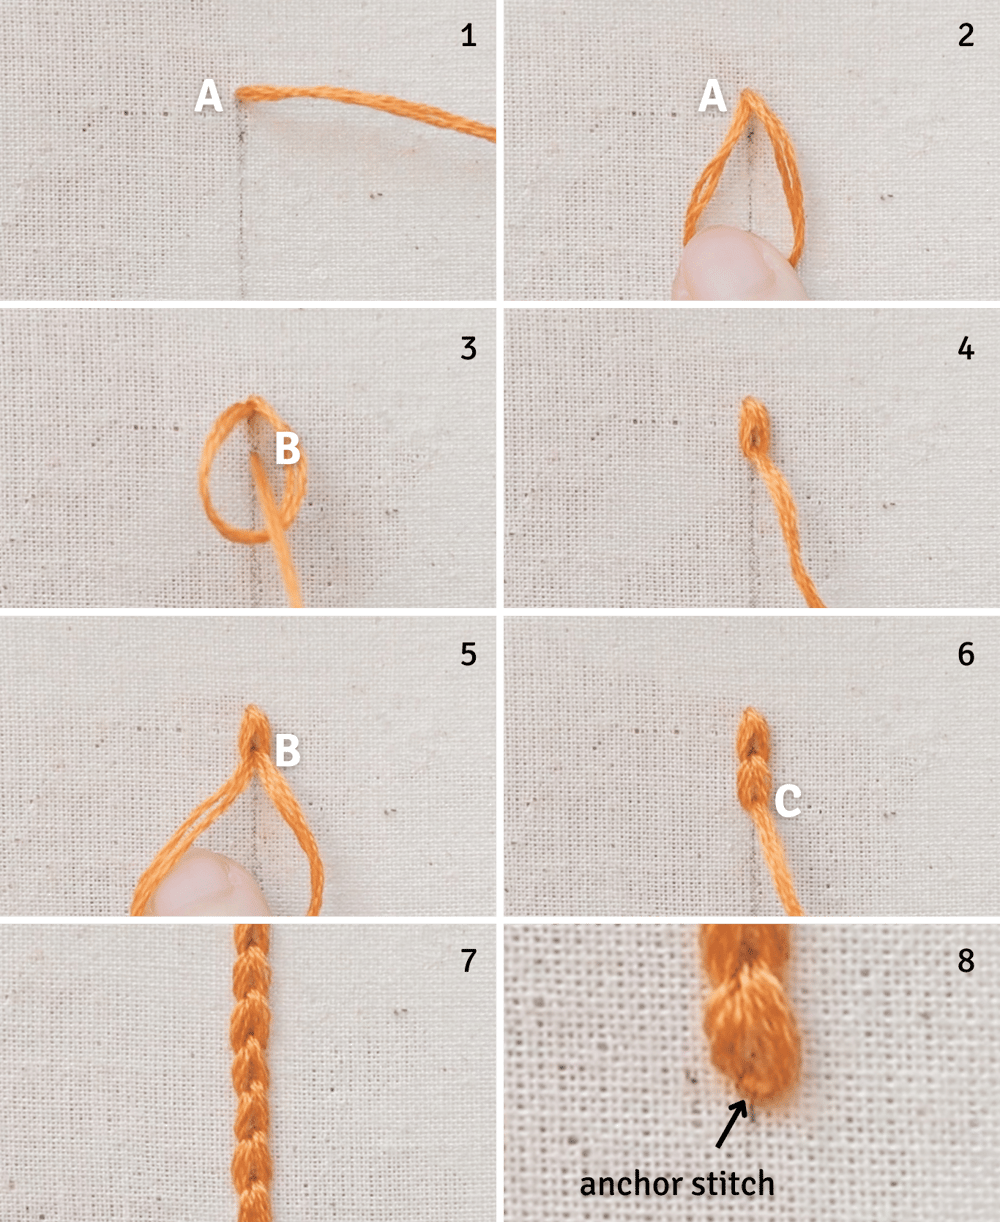
- To begin, bring the needle up through the back of the fabric and come up at the start of the line (A)
- Take the needle down at the same starting point (A), but don't pull the thread all the way yet, leaving a small loop on the fabric surface.
- Bring the needle up again a stitch length at (B) along the outline and inside the loop.
- Pull the thread all the way to create the first chain stitch.
- Repeat the same process: Needle down at (B), leaving a small loop.
- Needle up again inside the loop a stitch length at (C) and pull the thread all the way.
- Continue making a row of chains till the end of the line, keeping the stitches uniform in length.
- To secure the stitch, make an anchor stitch – a tiny stitch at the end of the last loop.
Changing Thread: Keep the Flow Going
If you run out of thread or want to change to a new colour midway, simply follow these steps:

- Make the last loop without creating the anchor stitch.
- Use your preferred method to do ending stitches for the current thread (to learn more about starting and ending threads, check out this video.)
- Start a new stitch of the new thread inside the loop of the old thread, where the next stitch is supposed to be.
- Continue all the usual steps as normal.
Closing a Circle: Seamless Design
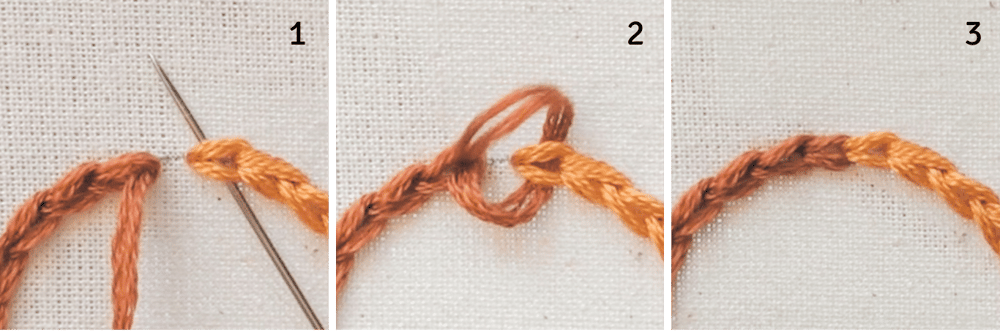
- When you're one stitch length away from touching the starting point, make the last stitch by sliding the needle/ working thread under the first chain stitch.
- Then, take the needle down at the same hole where it emerged.
- Voila! Your design looks seamless.
Reverse Chain Stitch: An Alternative Approach
Reverse Chain stitch provides the same beautiful look as the Chain stitch, but the process is reversed, and many people find it easier to do.
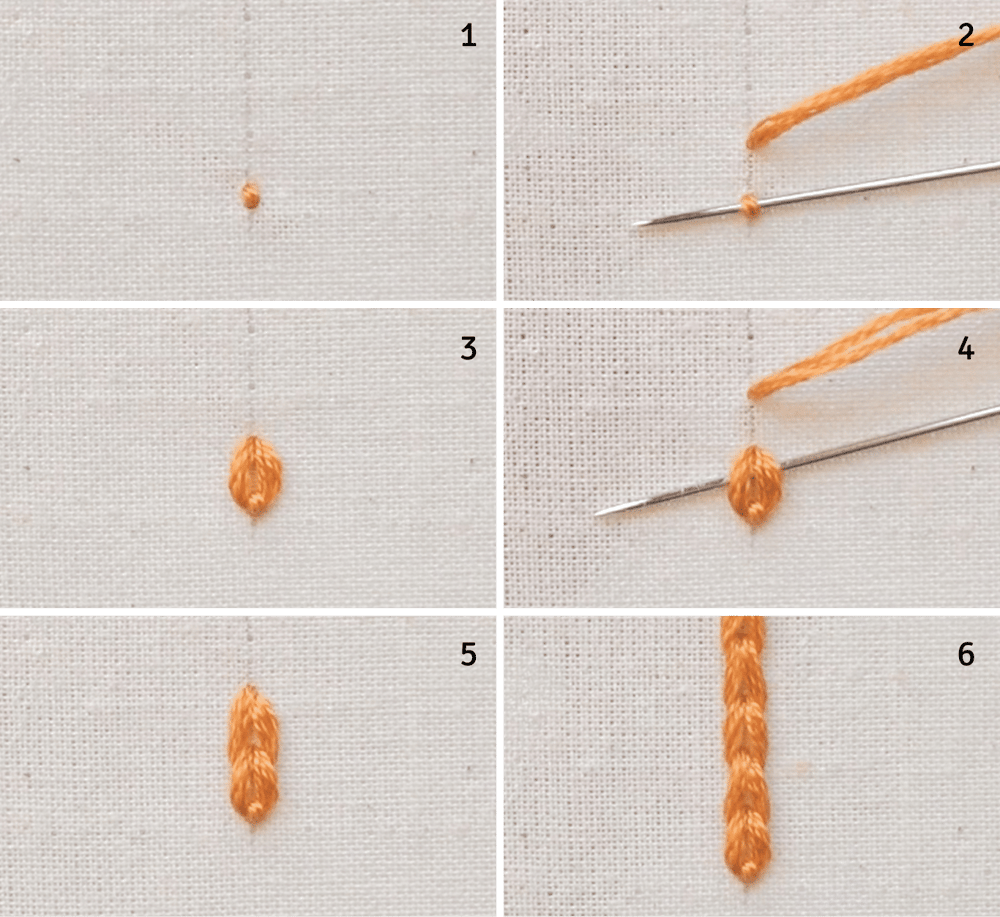
- To begin, you will actually make the anchor stitch first – a tiny straight stitch, just big enough for the needle to slide through.
- Bring the needle up a stitch length and slide it through the anchor stitch.
- Take the needle down at the same hole where it emerged, and you'll have the first chain.
- Make the second chain by bringing the needle up again a stitch length, and slide the needle under the first chain.
- Take the needle down at the same hole where it emerged.
- Repeat the same process of making new stitches by sliding the thread under the previous chain.
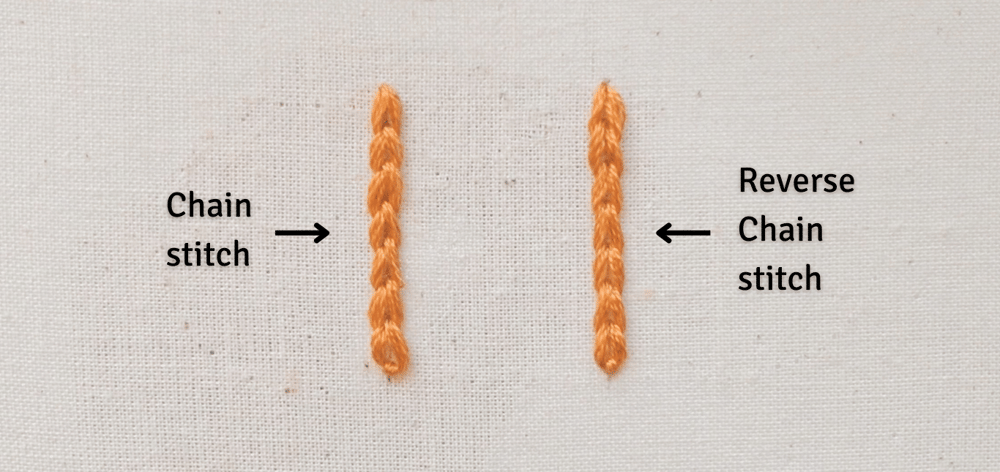
As you can see, Chain stitch and Reverse Chain stitch have identical looks so feel free to practice both stitches and decide which method feels more natural to you.
Chain Stitch Alternative: Back Split Stitch
If you love the look of the Chain stitch but find it time-consuming, try the Back Split stitch, which can give you a similar chain-like appearance with less effort. Just remember to double the number of strands you'd use for the Chain stitch to maintain the same thickness.
Practice pattern

Download this free practice pattern here
Don't forget to watch the YouTube video for step-by-step guide to stitch this pattern.

When using Chain stitch to fill an area, we should start with the outline first. That way we can ensure that the area will be well defined. Once the outline is done, we can then stitch the next row close to the previous one without leaving any gaps.
Chain stitch takes curves really well and is perfect for filling our avocado in a circular motion. This stitch can be a bit laborious, but the results are often worth it. You'll end up with a highly textured work that's both beautiful and durable – perfect for embroidering on clothing and more.
I hope you have fun with this cute avocado and happy stitching!
Comments ()