

In this lesson, we'll dive into the Back stitch, Split stitch, and Back Split stitch. These three stitches have a lot in common and are super handy when it comes to outlining and crafting beautiful letters in your embroidery projects.
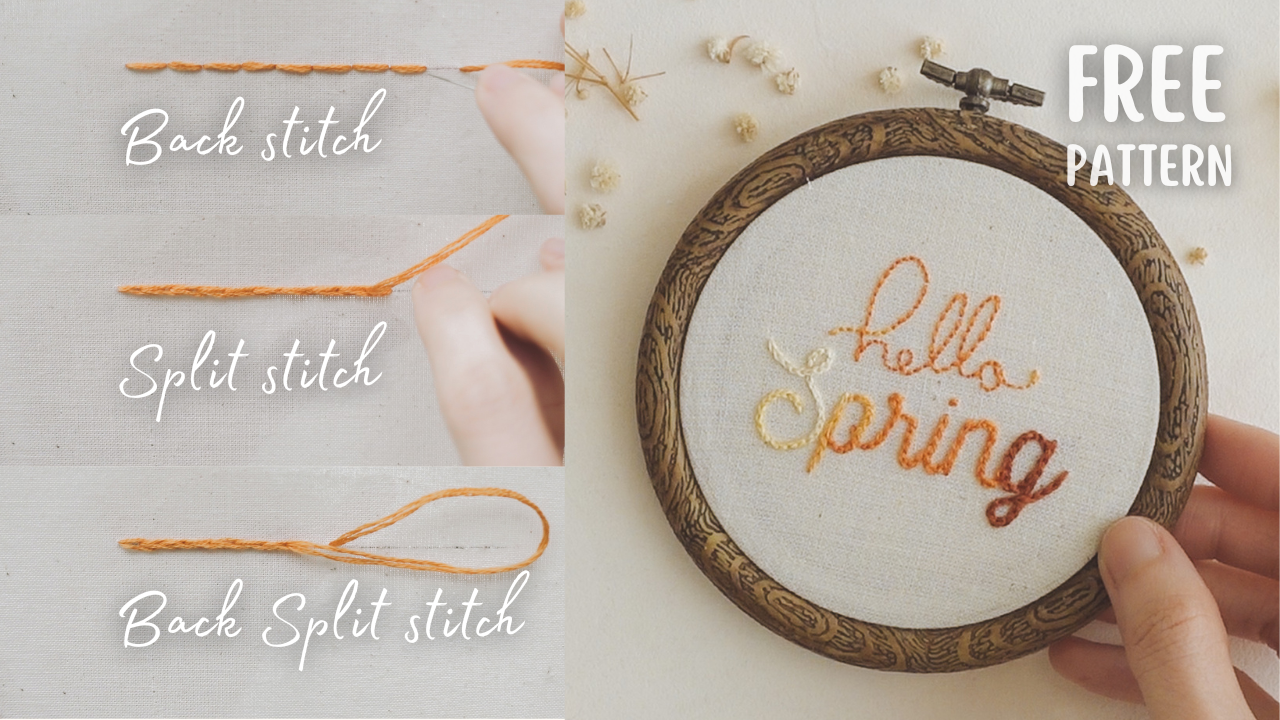
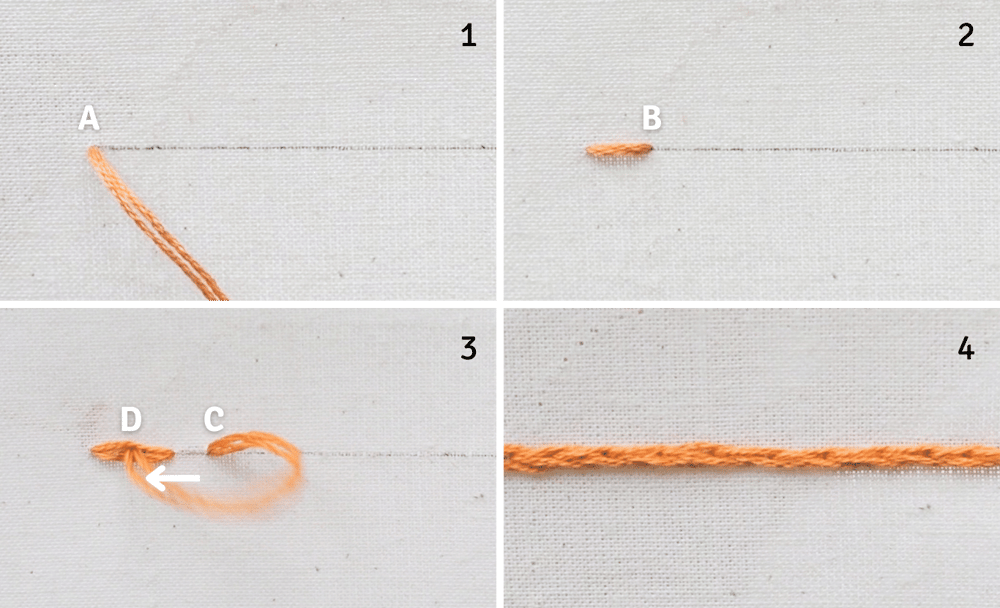
Back Stitch
- To begin, bring the needle up through the back of the fabric and come up at (A).
- Take the needle down a stitch length at (B) to create your first stitch.
- Bring the needle up again a stitch length at (C) and take the thread backward, down at the end of the first stitch at (B).
- Repeat the same process of making backward stitches.
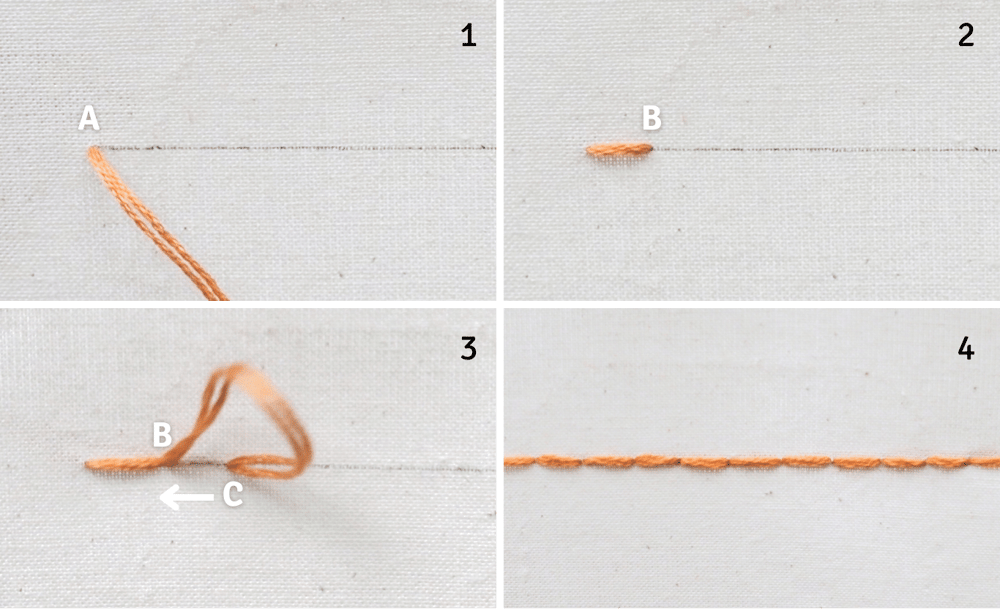
Split Stitch
- To begin, bring the needle up through the back of the fabric and come up at (A).
- Take the needle down a stitch length at (B) to create your first stitch.
- Bring the needle up at (C) - halfway along the previous stitch, so it splits the thread. Then, take the needle down a stitch length at (D) to create the second stitch.
- Repeat the same process of splitting the thread from below the fabric.
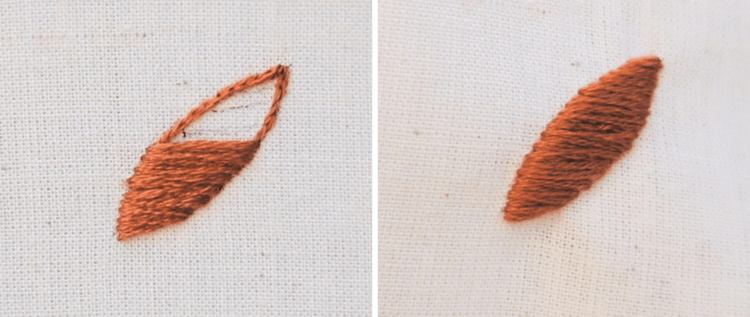
Besides making outlines and lettering, Split stitch is also a go-to for creating a padded edge, specially when you're working on solid filling stitches like Satin stitch and Long and Short stitch. It might be an extra step, but the result is worth it—your edges will be smoother and well-defined.
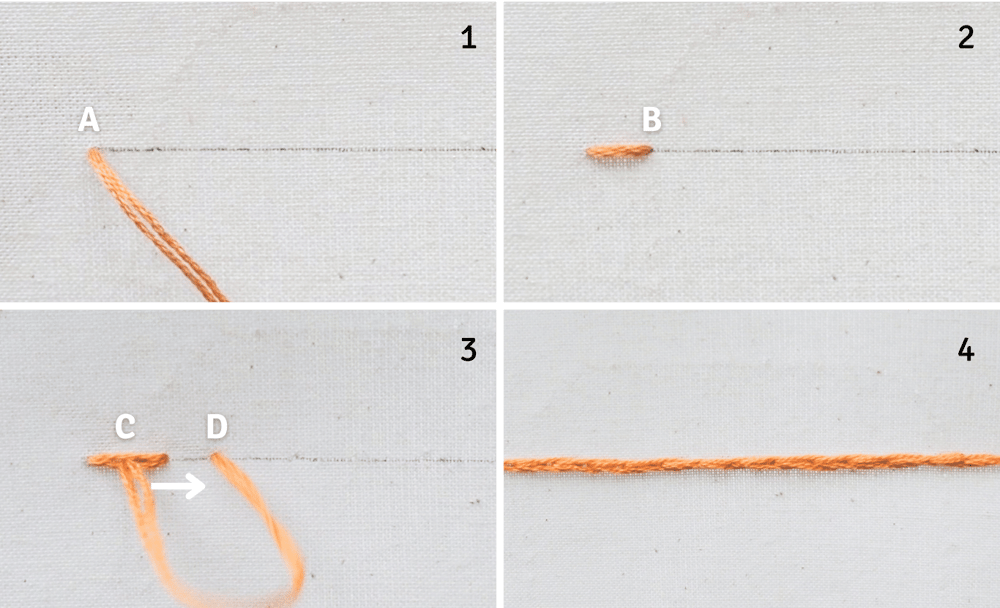
Back Split Stitch
Back Split stitch is really similar to Split stitch, the looks are identical. The only difference? You'll be splitting the stitch from above the fabric instead of below.
- To begin, bring the needle up through the back of the fabric and come up at (A).
- Take the needle down a stitch length at (B) to create your first stitch.
- Bring the needle up half a stitch length at (C) and take the thread backward, down at the middle of the previous stitch (D) so that it splits the thread.
- Repeat this process of creating backward stitches that split the previous stitches from above the fabric.
Both Split stitch and Back Split stitch create a continuous line, but instead of the "rope" appearance of the Stem stitch, they give you a "chain" look, quite similar to the Chain stitch, which we'll learn in lesson 5.
Split stitch and Back Split stitch are interchangeable, so it's all about personal preference. I prefer the Back Split stitch because splitting the thread from above is faster and more precise for me. It allows me to know exactly where the needle needs to go down and offers a chance to fine-tune the previous stitch if necessary.
*Tip: when working with Split stitch, Back Split stitch, or Chain stitch, it's best to use an even number of embroidery strands. This ensures that when you split the thread, it looks even on both sides.
Practice Pattern
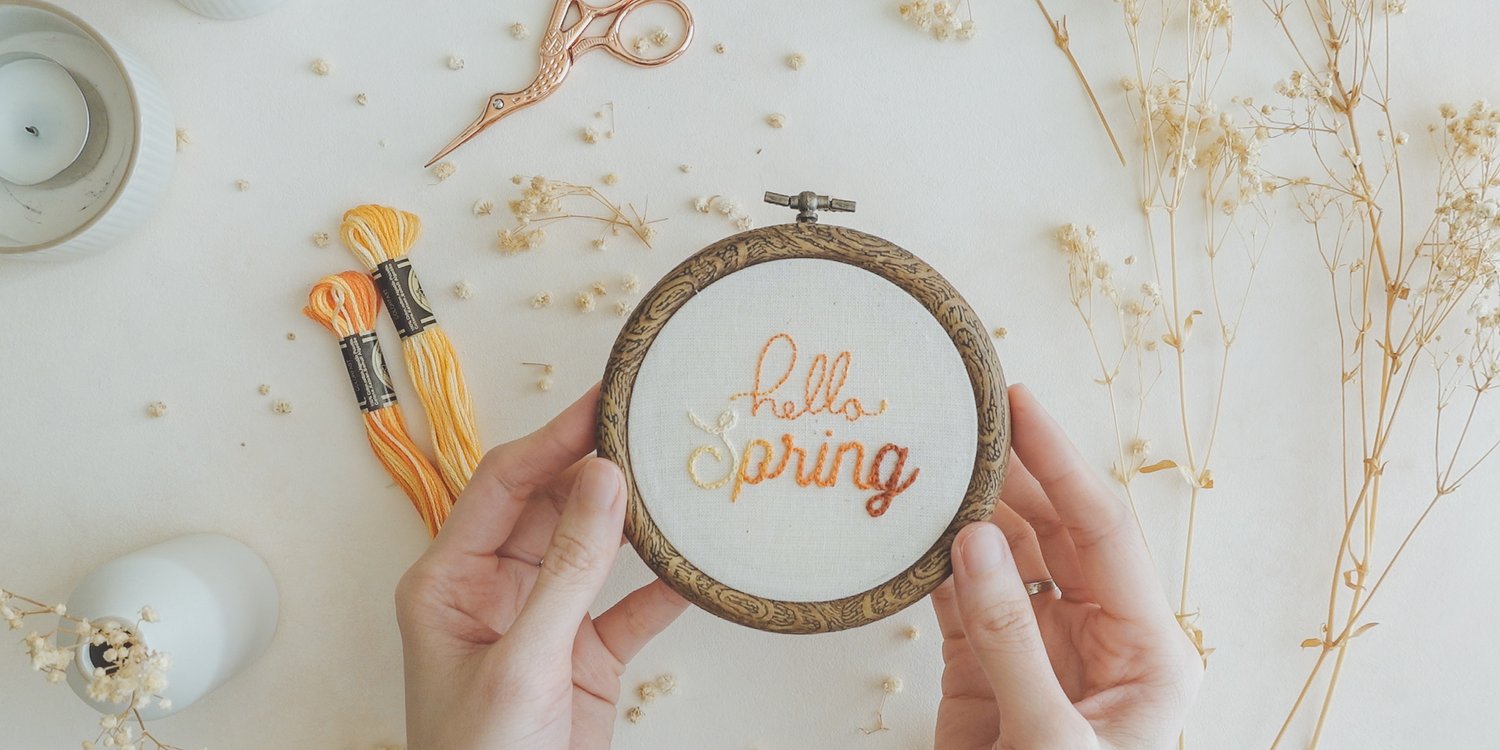
Download this free practice pattern here
This pattern used a variegated thread to make the text pop, but you can use a single color or play with multiple shades.
For "hello", I used the Back stitch. As for "Spring", the choice is yours – you can opt for either the Split stitch or the Back Split stitch. I'd suggest trying both to see which one feels more natural to you. Just remember, when the path gets curvy, shorten the stitches for smoother lines.
Don't forget to watch the YouTube video for step-by-step guide to stitch this pattern.
Happy stitching and see you in the next lesson!
Comments ()