

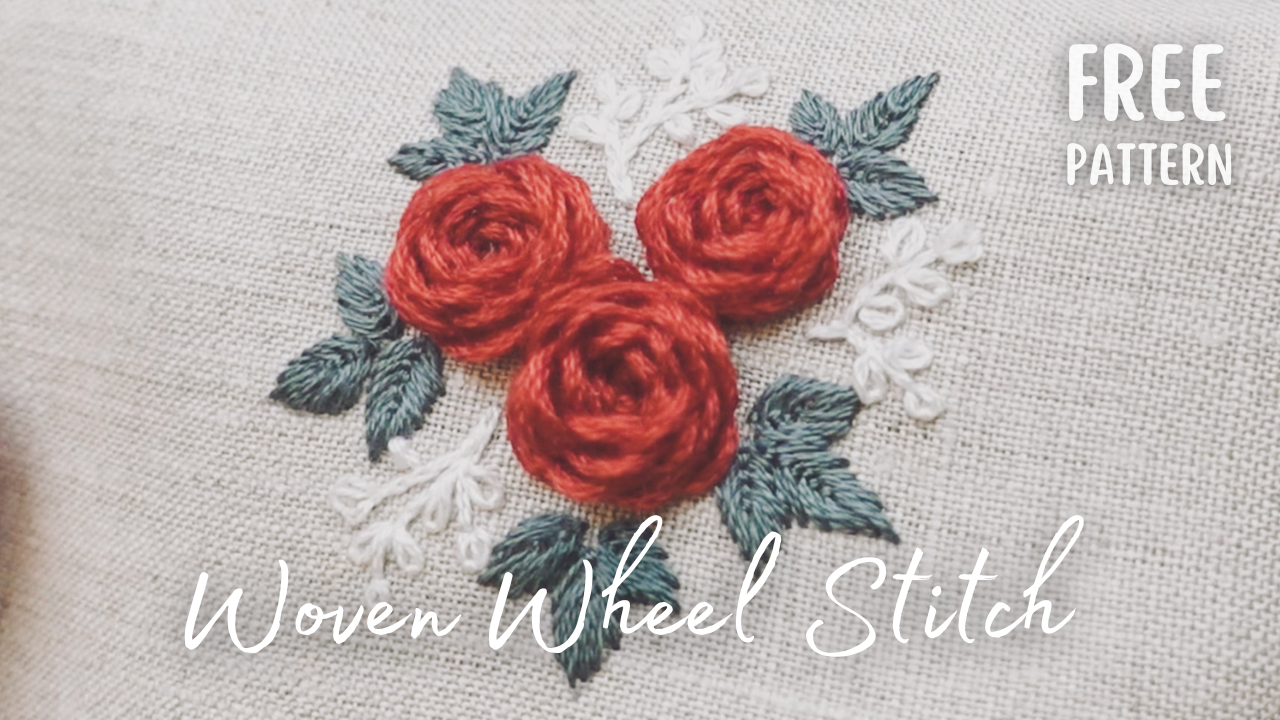
Welcome back for another exciting lesson of our Hand Embroidery Stitches series! Today's stitch is a darling – the Woven Wheel stitch, also known as the Woven Rose or Woven Spider Wheel stitch.
This stitch is perfect for creating stunning 3D flowers, and the best part is, it's super easy and enjoyable to do! After this lesson, you'll soon find yourself stitching roses left and right. I sure did! :)
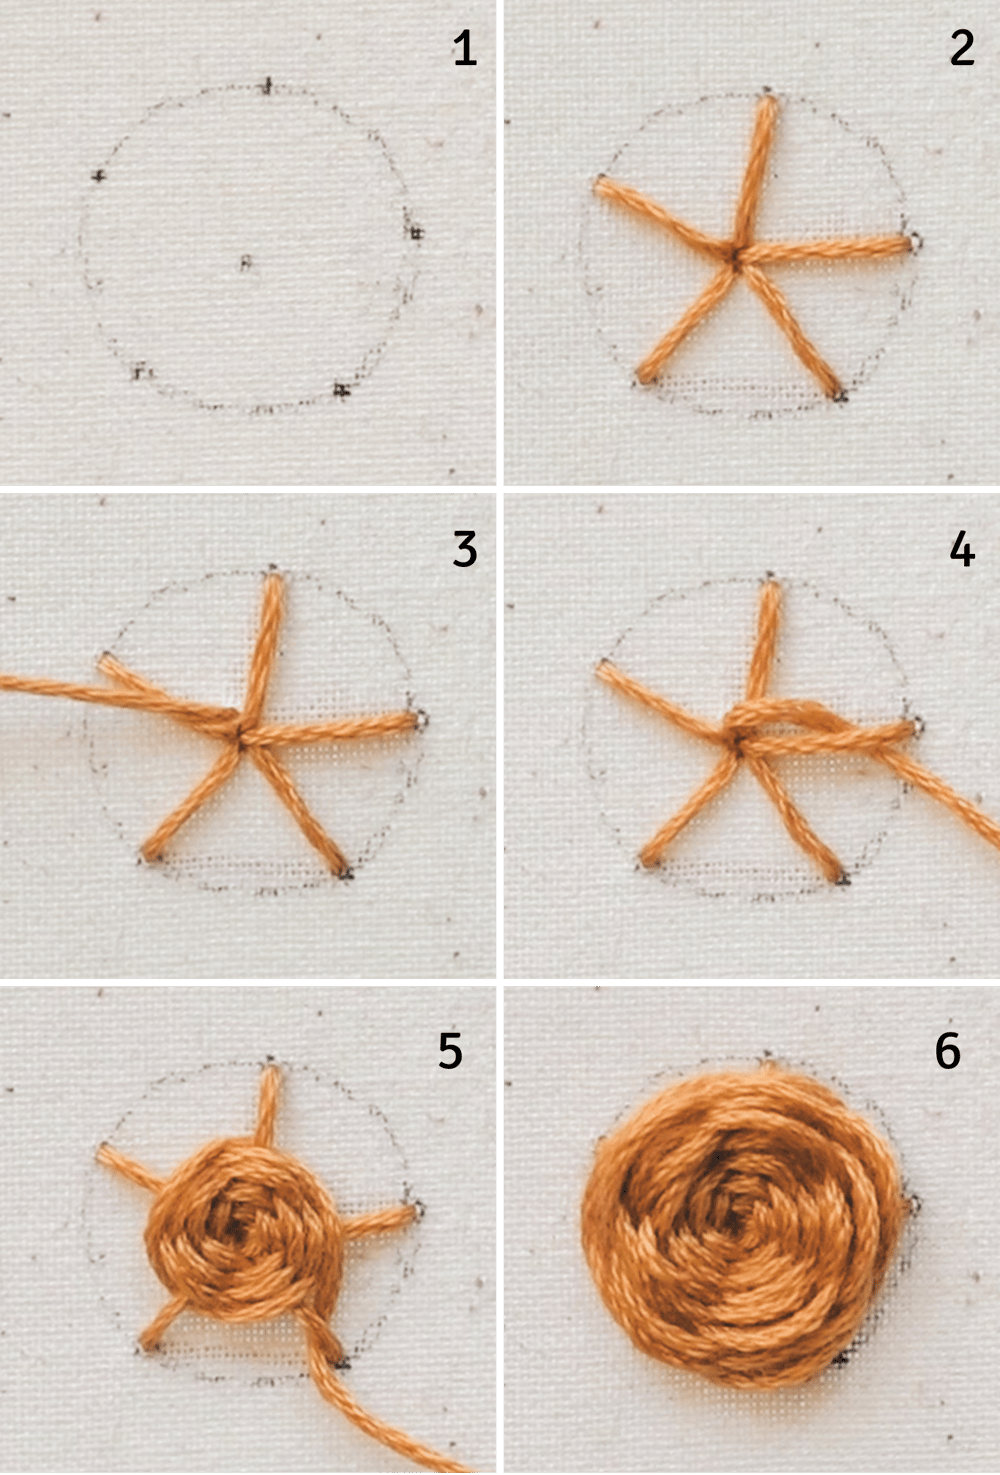
(1) Start by deciding how big you want your flower to be and mark the center with a heat eraser pen.
(2) The Woven Wheel stitch consists of two main parts. The first part is the foundation, made up of straight stitches radiating out from the center.
The straight stitches should be evenly spaced and in an odd/uneven number, such as 5 or 7. You can experiment with more or fewer stitches depending on the desired size of your flower.
(3) To start the second part of the stitch, bring your needle up through the back of the fabric near the centerpoint.
(4) Begin weaving by passing the needle under the first straight stitch, then over the next, under, over, and so on.
(5) Continue weaving in this manner until you can no longer see the straight stitches.
When weaving, you can use the blunt end of the needle (the end with the eye) to prevent accidentally catching the thread from the straight stitches.
If you run out of thread while weaving, simply secure the thread, start a new one, and continue where you left off. The connecting point will be hidden among the weaves.
(6) Finish your weaving and secure the thread on the backside. Your beautiful woven rose is complete!
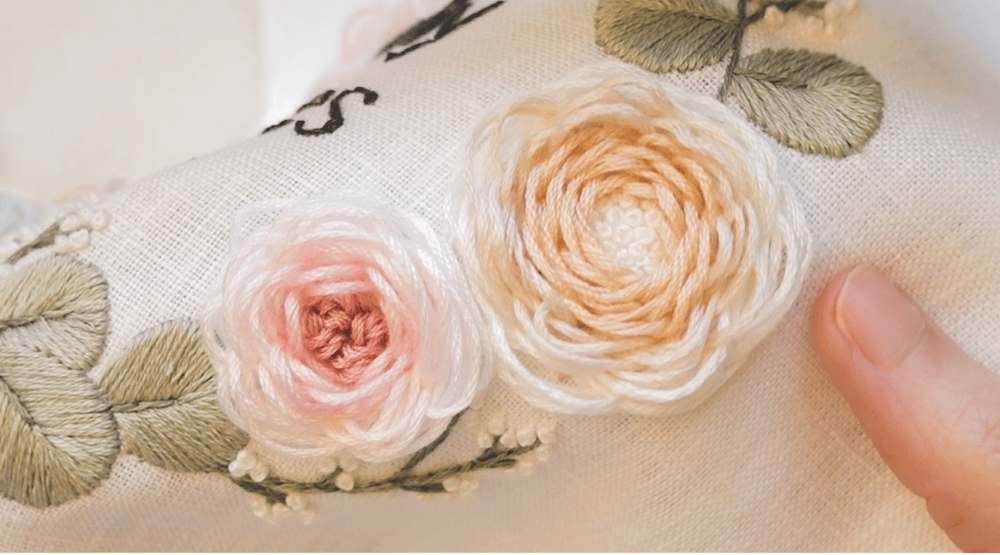
You can experiment with this stitch by creating roses with open centers. For this rose, I left some space in the middle and used the French Knot stitch to fill it in.
I also experimented with a lower thread tension to create looser ‘petals’. I find this technique makes the petals more distinct and fluffy.

And voila! Same stitch but two different looks just by changing the thread tensions.
You can also experiment with a foundation of 7 straight stitches to create more petals like how I did in this peony. Or using different shades of colors to create more realistic flowers like these garden roses.
This stitch is really simple to make but the results are so fabulous!
Practice Pattern
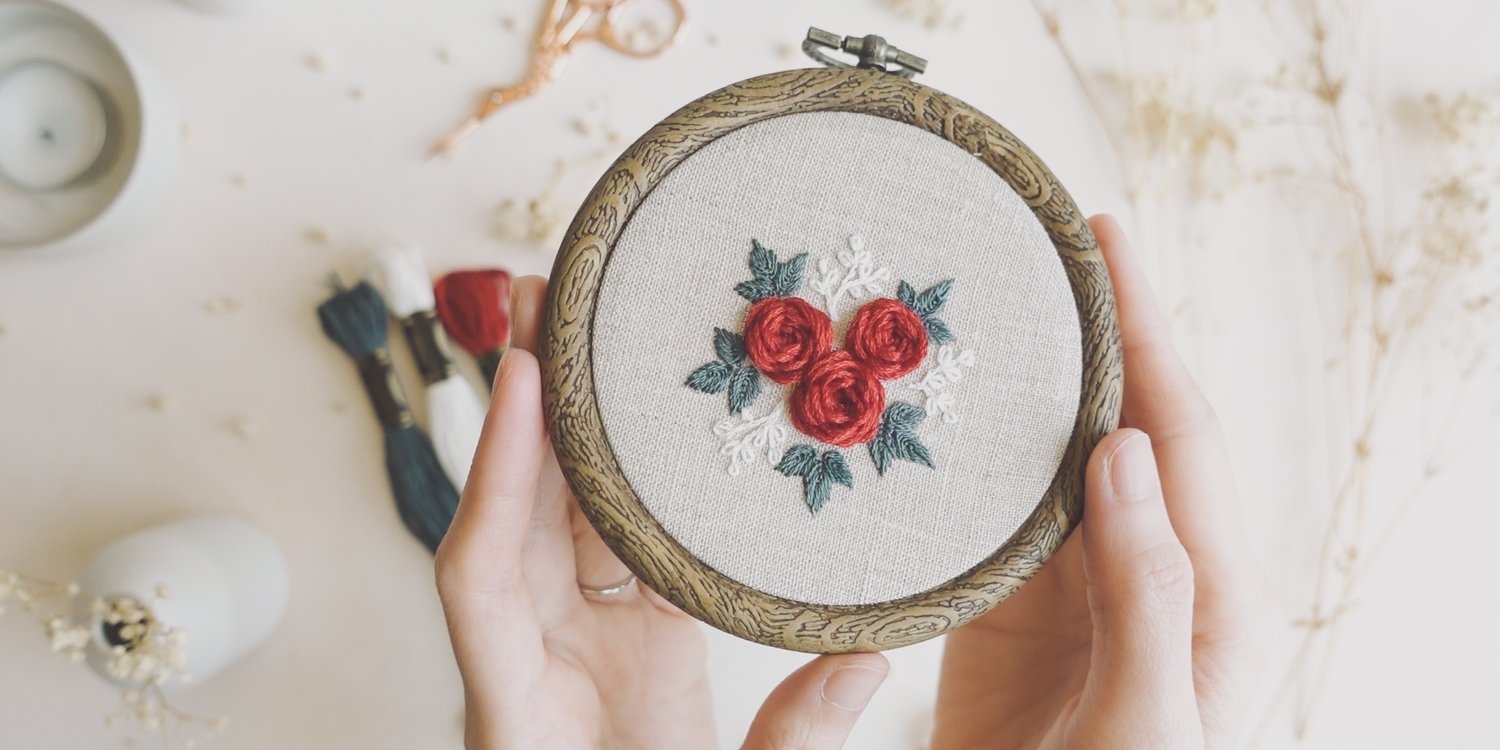
Download this free practice pattern here
Don't forget to watch the YouTube video for step-by-step guide to stitch this pattern.
I first made the leaves using the Fly stitch. For the little flower branches, I use the Back Split Stitch for the stems and the Lazy Daisy stitch to create the tiny flowers.
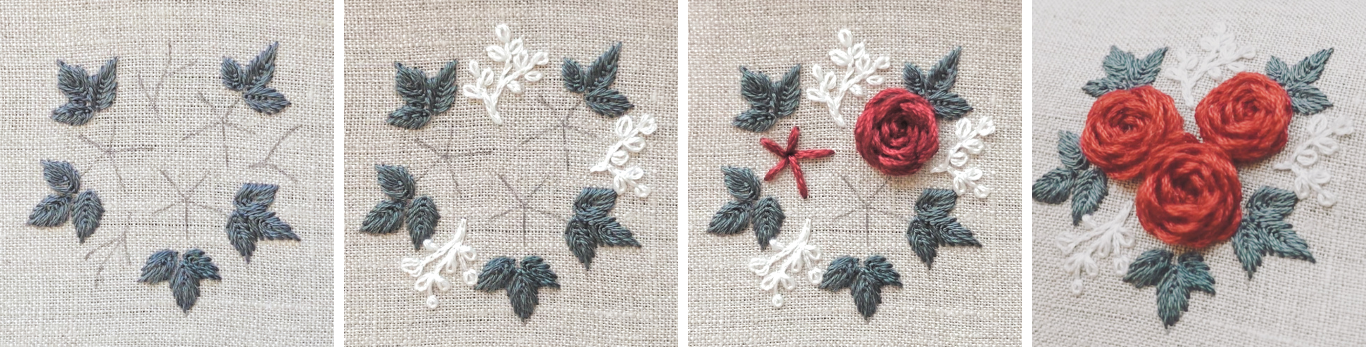
I experimented a bit with these roses by making them off-center. The purpose is to give the bouquet a more natural look. To make the rose more 'fluffy', remember to not weave the thread too tightly.
And there you have it, a simple stitch with amazing results. I love how 3D the roses look.
I hope you have fun. Happy stitching and see you in the next lesson!
Comments ()